MultiPass Tab
This tab enables you to specify various settings for MultiPass rendering. MultiPass Rendering allows rendering to be calculated in several steps, or passes.
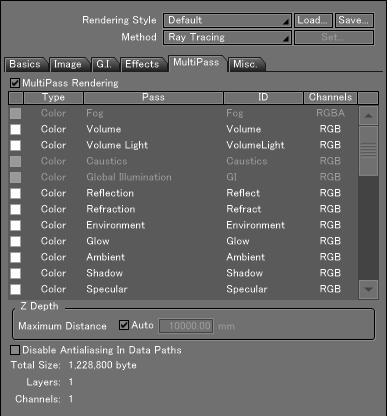
MultiPass Settings
- MultiPass Rendering
- Select this checkbox to perform MultiPass rendering.
- MultiPass Information List
- The list of passes and a checkbox to the left of each is enabled when the MultiPass Rendering checkbox is selected. You can select which pass is to be retained. If information that forms an element does not exist in the target scene, that pass becomes inactive and cannot be selected.
Note Only Transparency and Z Depth are displayed in Shade3D Basic.
- Selection Checkboxes
- Select the checkbox next to the pass you wish to retain as separate information. Selected passes are available for viewing in the Image Window by selecting the relevant pass from the Channel pop-up menu after rendering is complete.
- Type
- The type of the pass.
- Pass
- The name of the pass.
- ID
- The ID of the pass. This ID is used in the layer name if Single MultiLayer File is selected when saving the rendered image, or in the filename if Split MultiLayer Files is selected. This ID is also used as the key when a pass is obtained from a script or plugin.
- Channels
- This indicates the type (channel) of the information of the image to be retained.
- Z Depth Settings
- The following items are related when the Z Depth and Z Depth (n-th ray) pass types are subject to multipass rendering:
- Maximum Distance
- Select Auto to calculate the maximum distance automatically from the size of the whole scene. Otherwise, specify the maximum distance by entering a value in the text box.
- Disable Antialiasing in Data Paths
- The target elements are Position, XY Normals, Normals, UV1, UV2, Z Depth, Objects ID, Surface ID, and Marker. When a target element is subject to multipass rendering, a rendering result without using anti-aliasing is generated.
- Total size, Layers, and Channels
- The number of current layers, the number of channels, and the amount of memory required for multipass rendering is displayed according to the current MultiPass settings. Selecting many passes can result in a very high processing load. The information displayed here gives you a general sense of the processing load required.
MultiPass Sampling Count
When rendering with Path Tracing and Global Illumination Path Tracing, the sampling count for each pixel is displayed visually using different colors.
Effects such as Surface Quality and Light Quality can be confirmed visually, making adjustments easier.
| Basic | Standard | Professional |
|---|---|---|
| - | O | O |
Using MultiPass Sampling Count
On the MultiPass tab of the Rendering Settings, enable the Sampling Count checkbox.
Note The Sampling Count checkbox becomes available (enabled) when the Rendering Method is set to Path Tracing, or Global Illumination is set to Path Tracing or Path Tracing + Photon Mapping.
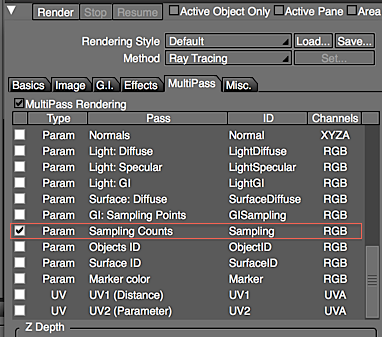
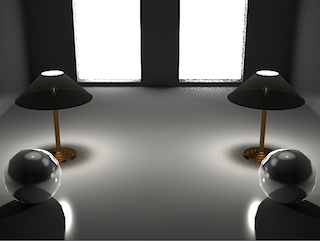
Sampling for Different Levels of Surface and Light Quality
- Rendered image using Path Tracing (Quality of ball on the left is 3.0; the right is 1.0)
- Sampling Count image
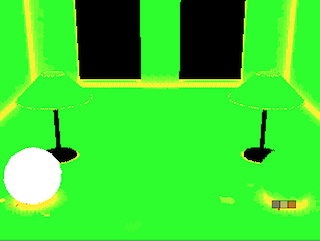
- Sampling Count image of indirect light
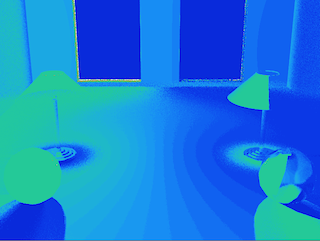
Note In order from fewest to greatest Sampling Counts: Blue < Green < Red < White.
Rendering Progression Steps and Display
| Rendering Phase | Ray Tracing | Path Tracing |
|---|---|---|
| Block Large, Medium, Small (No Global Illumination) |
Not used | Sampling Count |
| Block Large, Medium, Small (Global Illumination Path Tracing) |
Sampling Count of indirect light | Sampling Count |
| Irradiance Cache Generation Phase | Sampling Count of indirect light | Sampling Count of indirect light |
Note MultiPass Sampling Count should be used as a guide when adjusting for quality, but definite results are not guaranteed.