Using Weight Paint
First start Weight Paint by choosing it from the Toolbox (under Modify > Tools), choosing Tools > Modify > Weight Paint from the Menu Bar, or clicking the Weight Paint button in the Skin Window.For a description of each feature, see Weight Paint Tool Parameters Reference.
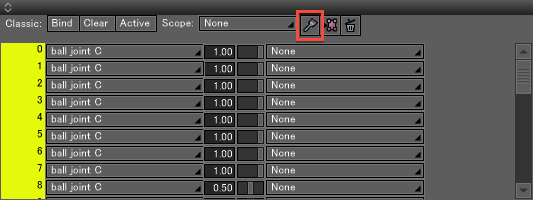
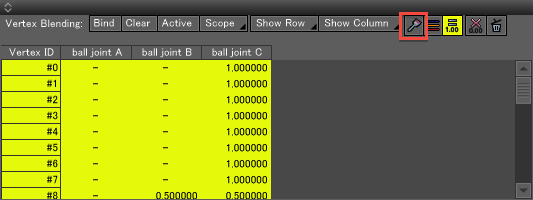
Selecting an Object
Select a polygon mesh or curved surface you wish to apply skin to.Creating Skin
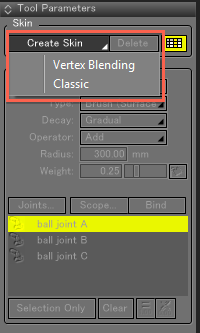
- Select an object without Skin, and click the Create Skin button.
- Choose the Skin Type you wish to use from the pop-up menu that appears.
Binding
Apply binding to the joints and set the initial skin values.This is not necessary if binding has already been applied.
The steps involved are almost the same as when applying binding from the Skin Window.
- Specify the joints to bind using Scope.
- Select the vertices to bind.
Either select the vertices to bind in Vertex Selection Mode before using Weight Paint, or switch the Mode to Select from the Weight Paint Tool Parameters in order to select the desired vertices.
- Apply Binding to the Selected Vertices
Specify the Joints to Display
It is possible to specify the joints to display according to your needs.To change the joints shown, click the Joints Button and select the joints you wish to display from the pop-up menu.
A list of the joints with Weight settings is shown when binding is newly applied.
Radius Settings
The Radius can be specified by direct input in the Radius text box or by right-clicking and dragging in the Figure Window.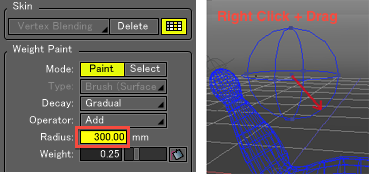
Other Weight Paint Settings
Adjust the Type, Decay, and Operator settings as necessary.See the Tool Parameters Reference for a description of these parameters.
Selecting Joints
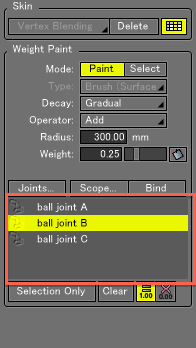
- Select the joints you wish to work on from the list.
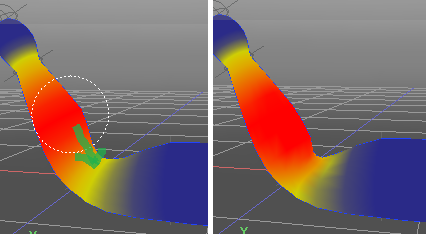
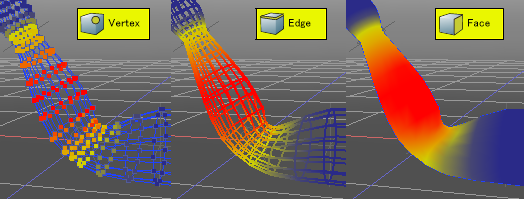
- The Weight value of the bound vertices of the selected joint are displayed using a color gradation.
Note Different methods of displaying the Weight color are available by switching between Vertex, Edge, and Face Selection modes.
Applying Weight Paint
Adjust the Weight of joints bound to the object by holding down the mouse button and tracing the surface of the object in the Figure Window.