Weight Paint Tool Parameters Reference
Weight Paint settings are shown in the Tool Parameters Window when Weight Paint is active.
Layout
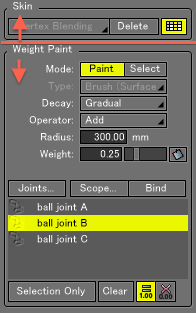
Skin Settings are displayed at the top of the Tool Parameters Window, and Weight Paint settings are displayed below.

Skin Settings

- Create/Convert Skin Pop-up Menu
- If Skin settings have not been created for the selected object, clicking this button displays a pop-up menu with the choice to create either the Vertex Blending or Classic Skin Type.
- If Classic Skin settings have been applied to the selected object, selecting Vertex Blending from this pop-up menu allows a basic conversion from the Classic Skin Type.
- If Vertex Blending has been applied to the selected object, a conversion is not possible, and thus this pop-up menu is disabled.
- Delete Button
- Clears all Skin settings from the selected object, including the Skin Type.
- Show/Hide Skin Window Button
- Toggles display of the Skin Window.
Binding Settings

- Joints... Pop-up Menu
- Use to limit which joints (including bones) are displayed.
- Scope... Pop-up Menu
- Specifies which joints to apply binding to.
- Bind Selection Button
- Applies Auto-Binding to the selected vertices within the specified Scope.
Paint Settings

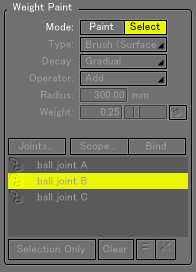
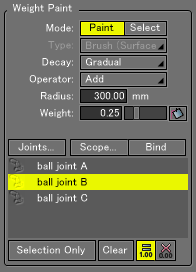
- Mode Buttons
- Switch between Paint and Select tools.
- Type Pop-up Menu
- Switch between Brush (Surface Search) and Magnetic (Spatial Search) modes for the Weight Paint tool.
- *For Curved Surfaces, only Magnetic (Spatial Search) mode can be used, and this menu is disabled.
- Decay Pop-up Menu
- Specifies the brush shape (decay curvature) of the Weight Paint tool.
- Operator Pop-up Menu
- Specifies how the Weight value is calculated for the vertices targeted by the Weight Paint tool.
- The Max and Min Weight values are used when trimming the Weight values to that specified in the Weight parameter.
- Temporarily switch between Add, Subtract, Min and Max when drawing with the Weight Paint tool by pressing the Shift key.
- Radius
- Specifies the radius size of the Weight Paint tool.
- Weight
- Specifies the Weight value of the Weight Paint tool.
- Fill Bucket Button
- Applies the specified Weight value to all the selected vertices at once.
- Joint List
- Used to specify the joints displayed and those to which Weight Paint will be applied.
- Selection Only
- When enabled, applies Weight Paint only to selected vertices; when disabled, Weight Paint can be applied to both selected and unselected vertices.
- Clear
- Deletes the Weight values of joints bound to the selected vertices.
- Normalize All Skin Weight to 1.0 Button
- Automatically adjusts the Weight value of the joints or bones bound to each selected vertex to 1.0.
- Remove Skin Weight from Selected Vertices with 0.0 Button
- Deletes selected vertices with joints with a Weight of 0.0.
Notes & Precautions
With Vertex Blending, the sum Weight of the joints bound to each vertex must be 1, and if no other Weight value is specified for a particular vertex, its Weight will be drawn as 1 regardless of the Weight Paint tool's Weight value.
