TextEffector
To display TextEffector, select Tool Box > Create > Other > TextEffector...
TextEffector allows you to input an installed font into a Shade3D scene as an object. It also modifies the text and creates 3D text with simple operations.
| TextEffector |
|---|
|
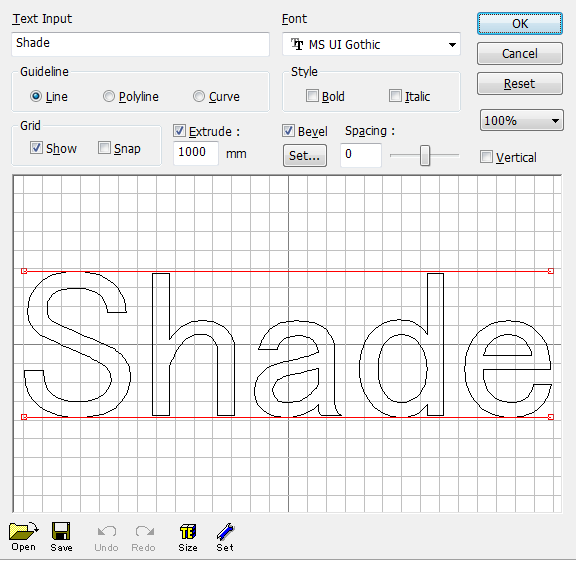
- Text Input Text Box
- Type the text to be modeled in Shade3D. The preview area displays the outline of the text, automatically resizing it by the number of characters. Up to 36 2-byte characters or up to 72 1-byte characters are allowed. When an alphabet font, e.g., Helvetica or Times, is selected, no 2-byte characters are not allowed within.
- Font Popup Menu
- Select the font for the string. The font selected with the menu is applied to the outline of the string. To type 2-byte characters such as kanji characters, use a Japanese font. With an alphabet font, you cannot input 2-byte letters.
Reference The character widths depend on the font, thus changing the font may make the characters appear to change in size in the preview area. This is because the preview area automatically resizes the string to its width. TextEffector supports all TrueType fonts, Postscript Type1 fonts, and ttf-format OpenType fonts.
- Guideline
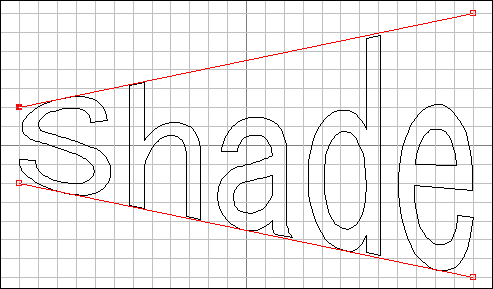
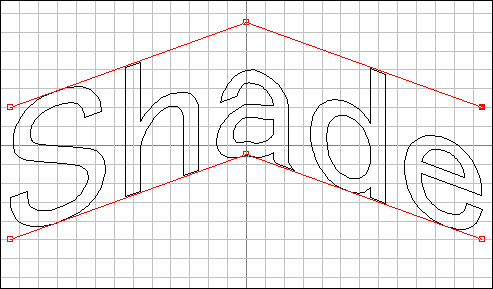
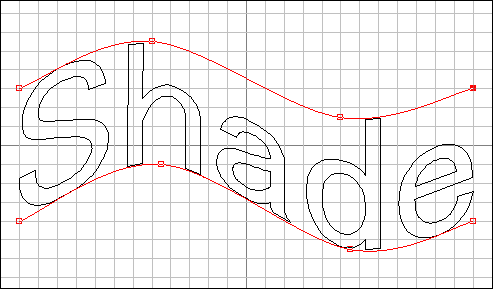
- Select the morphing style of the text guidelines. The red lines displayed on the top and bottom of the text in the preview area are the guidelines. Select from Line, Polyline, or Curve options. The characters of the text are morphed along the guidelines. The text morphing depends on the states of the control points on the guidelines.
- Style
- Use this to change the style of the characters. Check the Bold checkbox to make the characters bold. Check the Italic checkbox to make the characters Italic.
- Grid
- Check the Show checkbox to show the grid in the preview area. Check the Snap checkbox to snap the control points to the intersection and middle points on the grid in the preview area.
- Extrude Checkbox, Text Box
- Turn it on to let the characters have thickness by the degree specified in the text box. When it is off, the characters are drawn as closed line objects without thickness (planes). In both cases, the hole settings of Shade3D are automatically applied to the hole portions of the characters.
- Bevel Checkbox
- Turn it on to bevel the sides of the modeled characters. To configure the bevel settings, click the Set button to show the Bevel Settings dialog. The bevel settings are initially configured to make the sides of the 3D characters thicker outward. Therefore, even if the characters are beveled, lines whose front side and back side are closed are the same as those of the non-beveled 3D-configured characters (extruded objects) or non-extruded characters. When the Extrude checkbox is off, the bevel settings are automatically disabled. When 0 is specified in the Extrude checkbox, the Bevel Settings dialog cannot be displayed.
Important TextEffector Lite in Shade3D Basic provides a Bevel Settings dialog in which you cannot open or save the bevel settings.
Important TextEffector in Shade3D Basic provides a Bevel Settings dialog that does not allow you to add or delete points nor configure or delete handles in configuring the bevel settings.
Important TextEffector in Shade3D Basic provides a Bevel Settings dialog that does not allow you to use the contextual menu in configuring the bevel settings. In addition to that, double-clicking a point does not show the dialog to configure point settings by numerical input.
- Set... Button
- The Bevel Settings dialog is displayed to allow you to configure the bevel settings.
See also Bevel Settings
- Spacing Slider, Text Box
- These are used to configure the spacing of the text. The text box allows you to specify it by numerical input. Changing the spacing setting does not modify the size of the characters and form of the outlines. The setting modifies only the spaces between the characters. The wider the spacing, the wider the text. The preview area of TextEffector automatically zooms out the text so that the text fits the area.
- Zoom Popup Menu
- Use this to change the size of the preview area view. This applies only to the preview area of TextEffector. It does not apply to the size of the character outlines in the Figure Window.
- Vertical Checkbox
- Orients the characters vertically. The preview area also shows the characters vertically. This is applicable to 2-byte characters of Japanese fonts. For characters of an alphabet font, the string is turned 90 degrees. Even for 1-byte alphanumeric characters of a Japanese font, the string is turned 90 degrees. To apply Vertical, use 2-byte alphanumeric characters.
- Open Button
- Use this button load a guideline file (.gui) into the preview area.
- Save Button
- Use this button to save the guidelines in the preview area as a guideline file (.gui).
- Undo Button
- Use this button to undo the previous operation to the guidelines.
- Redo Button
- Use this button to redo the previous operation to the guidelines.
- Size Button
- This button shows the Text Size Settings dialog. The dialog allows you to configure the size of character outlines or size of modeled characters in the Shade3D Figure Window.
Text Size Settings 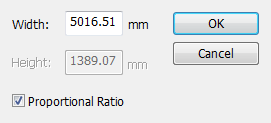
- Set Button
- This button shows the Preference dialog. Select Curved Surface or Polygonmesh for the type of the object when it is loaded to Shade3D from TextEffector.
Preference 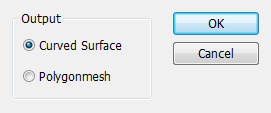
Important TextEffector Lite in Shade3D Basic does not allow an object to be loaded to the Shade3D Figure Window with the Polygonmesh type. The Preference dialog on Basic does not allow you to select Polygonmesh.
- OK Button
- Click this button to put the outlined object of the string in the Shade3D Figure Window.
The configured TextEffector settings are automatically stored and applied when TextEffector is activated next time.
An outlined object of the string is a set of one-character parts.
The character parts are named after its letter. For characters corresponding to a boolean operator or curved surface split operator, an 1-byte space is automatically added to the top of its name to prevent special effect of such an operator from being taken unexpectedly.
For lines forming a hole on a character, the Hole checkbox is automatically turned on in the Object Info window.
Reference You can edit objects output to Shade3D with TextEffector again by selecting the part including all its objects with the Shade3D Browser and selecting Set TextEffector Attributes from Attributes popup menu.
- Cancel Button
- Click this button to quit TextEffector, discarding the operations, and return to Shade3D.
- Reset Button
- Click this button to restore the initial guideline settings. The string you typed in the Text Input text box remains the same.
