Toon Renderer Reference
Each Toon Renderer option is described here.
Toon Settings Window
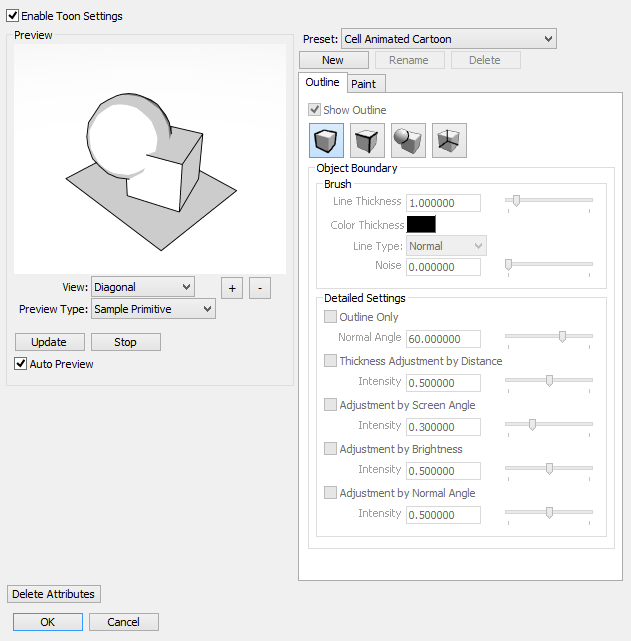
Toon Renderer settings can be specified here. To apply settings for the whole scene, click the Toon Settings button in the Toon Rendering Settings window.
To apply Toon Renderer settings to individual surface textures, select Toon Settings... from the Info pop-up menu in the Surface Window. Alternatively, with the appropriate shape or part selected, in the Browser select Toon Settings... from the Attributes pop-up menu.
| Toon Settings |
|---|
|
- Enable Toon Settings
- Enables all the settings in the Toon Settings dialog. Deselect this checkbox to temporarily disable Toon Settings.
- Preview Group
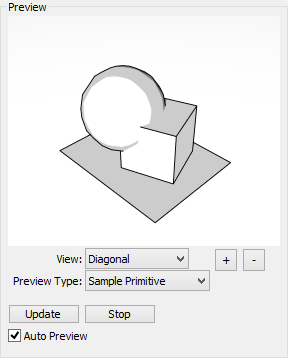
- Preview Image
- Shows a preview of the Toon Settings specified on the right.
- View
- Specifies the angle of the scene to display in the preview image. Choose between Diagonal, Front, Top, Side, or Perspective. When Perspective is selected, the current scene camera's direction, using the center of the selected shape as the camera target, is used for the field of view.
- + and - Buttons
- Zooms the preview image in and out.
- Preview
- Specifies the scene used in the preview image. Choose between Sample Primitive and Selected Shape.
Selecting Sample Primitive will display a sphere, cube and floor arranged in a simple scene. Selecting Selected Shape displays a preview of the shape currently selected in the Browser.
However, if the selected shape is complex there may be a delay in updating the preview. In that case it is better to select Sample Primitive for the preview. - Update
- Updates the preview image to reflect the latest settings.
- Stop
- Stops updating the preview image.
- Auto Preview
- Automatically updates the preview image when any of the settings change.
- Preset
- Specifies the style of Toon Settings. Select from the below presets. Click the New button to add a new style to the list.
- New
- Adds a new preset.
- Rename
- Change the name of a preset created with the New button.
Names of the default presets cannot be modified. - Delete
- Deletes a preset created with the New button.
The default presets cannot be removed. - Outline Tab
- The outline settings are grouped here. These settings only become available after clicking the New button to create a new preset.
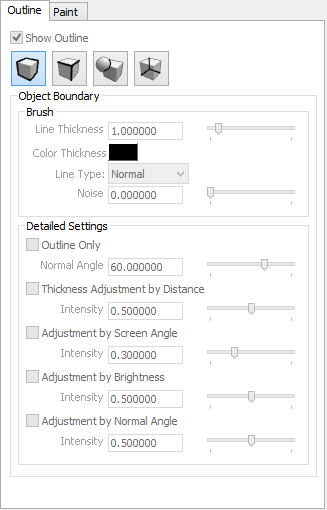
- Show Outline
- Uses the Outline tab settings when rendering. When unselected the settings will not be used.
- Outline Type Buttons
- These settings determine the outline style. Select Object Boundary, Normal Boundary, Cross Section Boundary, or Hidden Lines for the outline type settings.
- Object Boundary
- The boundaries between overlapping objects. This includes the boundary between objects and the background.

- Normal Boundary
- The boundary line drawn when the angle between adjacent polygons is large.

- Cross Section Boundary
- Shows the lines at the position where two objects intersect. Calculating cross section boundaries of objects takes time, so only use this setting when necessary.

- Hidden Lines
- Shows the lines hidden behind the object.

- Brush Group
-
- Line Thickness
- Specifies the thickness of the whole line.
This is relative to the render resolution. Setting this to 0 will disable these lines. - Line Color Box
- Specifies the color of the whole line.
- Line Type
- Specifies the type of the whole line.
Select either Normal or Pencil.
Normal uses a single color for the line. Pencil uses a varying transparency along the stroke from the start to end points of the line. - Noise
- Specifies the level of noise for the whole line. By increasing the level of noise you can create crayon or chalk effects.
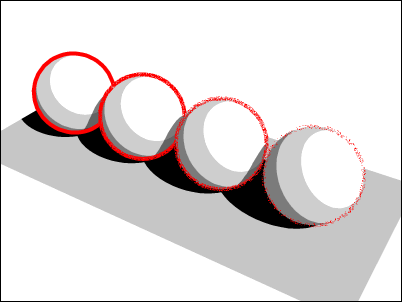
(From left, values are 0.0, 0.3, 0.6, and 0.9)
- Detailed Settings
- Here detailed line settings can be applied.
- Outline Only
- When selected, only the object's outline is drawn.
- If a face is in the boundary area there will be no effect.
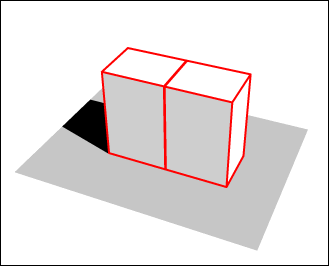
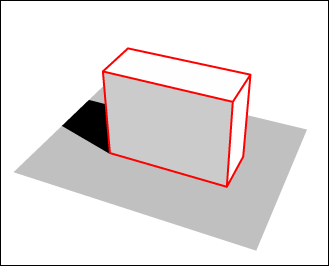
(Left: unselected; right: selected) - Normal Angle
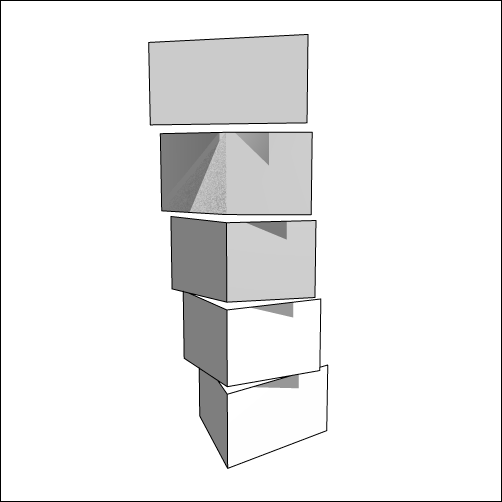
- Specifies the basic angle between adjoining faces. Boundary lines will not be drawn for objects larger than this angle. Enabled when the Normal Boundary outline button is selected.
- Thickness Adjustment by Distance
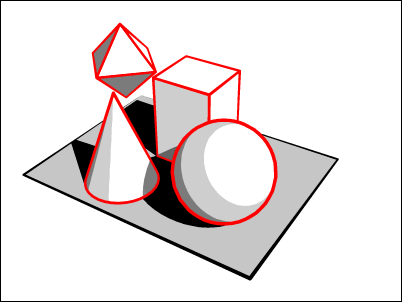
- When selected, the thickness of the line is adjusted with its distance from the camera. The degree of adjustment can be specified using the Intensity textbox or slider below. When unselected the settings will not be used.
- Intensity
- As the distance away from the camera increases, the outline will appear thinner. A value of 1.0 will cause the objects farthest from the camera to have an outline width of 0.
- Adjustment by Screen Angle
- When selected, the thickness of the line is adjusted with the angle of the line to the screen. The degree of adjustment can be specified using the Intensity textbox or slider below. When unselected the settings will not be used.
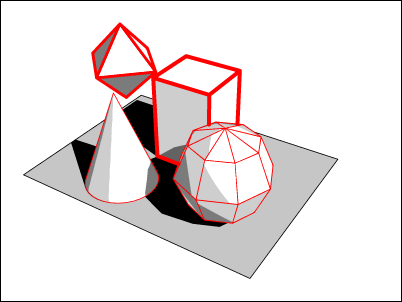
- Intensity Textbox and Slider
- Specifies the basic angle between adjoining faces. The thickness of boundary lines will be set for objects larger than this angle.
- Adjustment by Brightness Checkbox
- When selected, the thickness of the line is adjusted with its brightness. The degree of adjustment can be specified using the Intensity textbox or slider below. When unselected the settings will not be used.
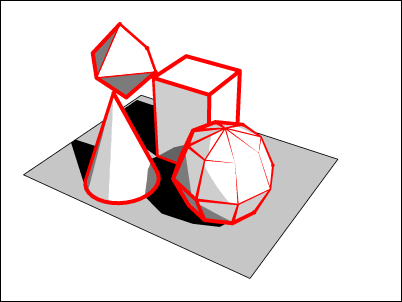
- Intensity
- The thickness of the outline will be adjusted depending on the object's brightness (resulting from light sources and shadows). Bright areas will have narrower outlines.
- Adjustment by Normal Angle
- When selected, the thickness of the line is adjusted with its normal angle. The degree of adjustment can be specified using the Intensity textbox or slider below. When unselected the settings will not be used.
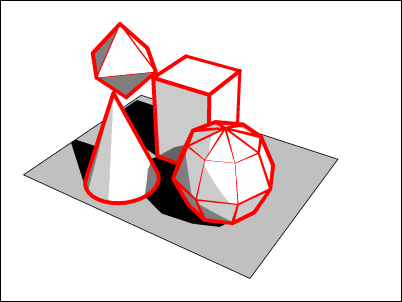
- Intensity
- As the angle with the camera plane becomes flatter, the object's outline becomes narrower.
- Paint Tab
- Here settings for shade, shadows, and specular parameters can be adjusted.
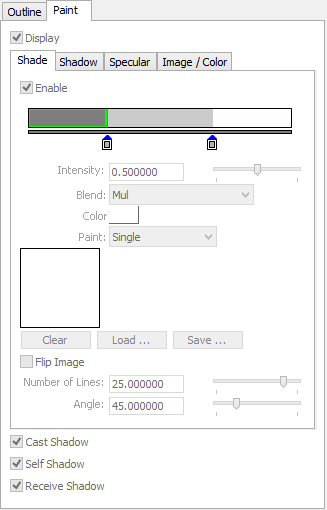
- Display
- When selected, the Paint tab settings will be used when rendering. When unselected the settings will not be used.
- Shade3D Tab
- These settings are for object shading (gradation showing the angle between the light and the object surface).
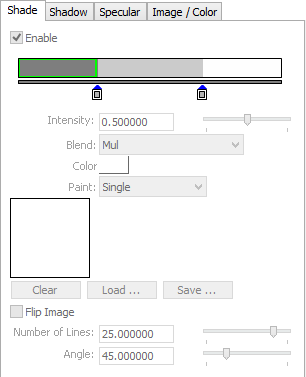
- Enable
- Uses the Shade3D tab settings when rendering. When unselected the settings will not be used.
- Gradation Bar
- Displays the gradations.

- Markers
- Specifies the boundaries for each change in gradation. Click on the gradation bar to add a marker at that position. Drag a marker downwards to remove it from the gradation bar.

- Intensity
- Specifies the color intensity of the selected gradation.
- Blend
- Specifies the method for blending the selected gradation with other gradations. Select Normal, Alpha Blend, Add, Sub, Mul, Comparison (Bright) or Comparison (Dark).
- Color Box
- Specifies the color of the selected gradation.
- Paint
- Specifies the paint type of the selected gradation. Select Single, Image, Haltone Dot, or Pencil.
- Image Box
- Displays the selected image when Image is selected from the Paint pop-up menu.
- Clear
- Removes the image loaded using the Load... button.
- Load...
- Loads an image to use when Image is selected from the Paint pop-up menu.
- Save...
- Saves the image loaded using the Load... button.
- Flip Image
- Inverts the color of the image loaded using the Load... button.
- Number of Lines
- Specifies the number of lines (spacing of lines that can be drawn per inch when the screen resolution is 72 DPI) when Halftone Dot is selected from the Paint pop-up menu. The default value is 25.
- Angle
- Specifies the angle of the hatching when Pencil is selected from the Paint pop-up menu.
- Shadow Tab
- Here settings that affect object shadows can be applied. The available options are the same as that of the Shade3D tab.
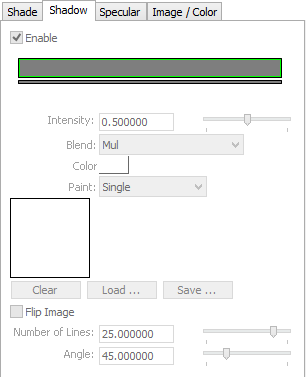
See also Shade3D Tab
- Specular Tab
- Here object specular settings can be applied. The available options are the same as that of the Shade3D tab.
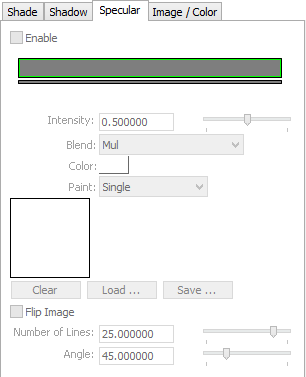
See also Shade3D Tab
- Image / Color Tab
- Processes the color information of object surfaces.
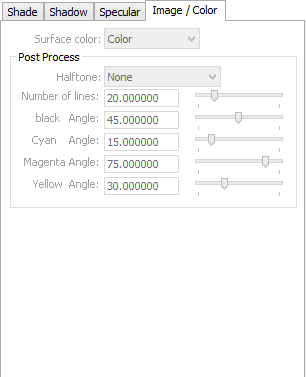
- Surface Color
- Specifies the type of process to use for the object's surface color.
- None will set the surfaces to display white. Color will leave the surface attributes unmodified. Grayscale will convert the surface attributes to grayscale.
- Cast Shadow
- The object will cast shadows.
- Self Shadow
- The object will cast a shadow on itself.
- Receive Shadow
- Shadows from other objects will be visible on the object.
Light Settings Dialog Box
Light settings for Toon Renderer can be applied here. With a light selected in the Browser, select Toon Settings... to open the Light Settings dialog box.
To adjust the settings for the Distant Light, select Toon Settings... from the Info button on the Distant Light Window.
| Light Settings |
|---|

|
- Enable Toon Painting
- Toon painting is applied to all objects in the scene.
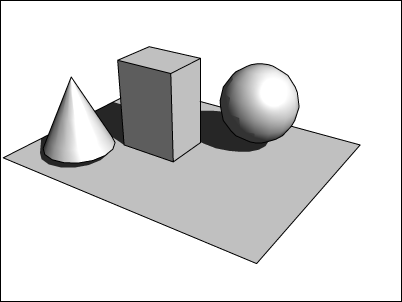
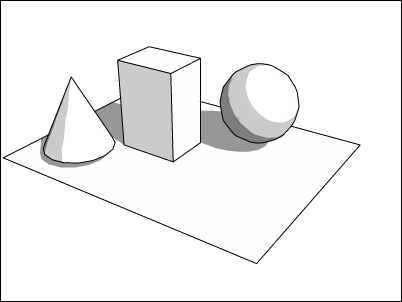
(Left: unselected; right: selected) - Intensity
- Specifies the intensity of toon painting of the selected light source.
Note When there are multiple lights in the scene, Add blending may cause objects to wash out. To avoid this, select Enable Toon Painting and adjust the Intensity for each light in the scene. Enabling Toon Painting for the main light in the scene, and disabling it for minor light sources in the scene can give subdued lighting results.
Toon Rendering Settings Dialog Box
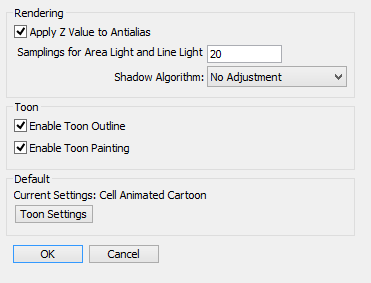
These Toon Renderer settings apply to the scene as a whole when rendering. In the Image Window, select Toon Renderer for the render method and click the Set... button to open this dialog box.
Surface Subdivision, Antialiasing, Render Shadows, and Ray Cast Level settings can be changed on the Basics and Misc. tabs in the Image Window.
| Toon Rendering Settings |
|---|
|
- Rendering Settings
-
- Apply Z Value to Antialias
- Applies antialiasing to the boundary between objects with a z-buffer and the background.
- Samplings for Area Light and Linear Light
- Specifies the sampling rate for area and linear lights.
- Shadow Algorithm
- Select Diffuse Adjustment, Normal Adjustment, or No Adjustment.
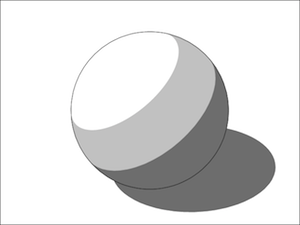
- Diffuse Adjustment
- When using the Photorealistic preset, diffuse colors blend smoothly and shadow boundaries stand out less.
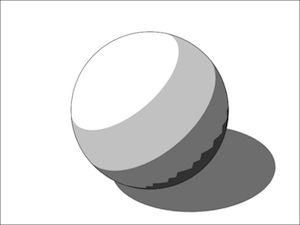
- Normal Adjustment
- Surfaces facing opposite the light receive shadows.
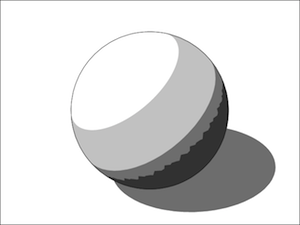
- No Adjustment
- No adjustments are made to shadows.
- Enable Toon Outline
- Enables toon outlines.
- Enable Toon Painting
- Enables toon painting.
- When unselected, the background color is used to fill. If white is set as the background technical illustration and other rendering can be done quickly, but trim boundary lines are not drawn.
- Toon Settings
- Click this button to open the Toon Settings Window, where you can adjust the toon settings for the scene as a whole.
Vector Output Settings Dialog Box (Shade3D Professional)
Selecting File > Export > Adobe Illustrator (Toon Renderer) or File > Export > Adobe Flash(SWF) (Toon Renderer) will open the Vector Output Settings dialog box.
The dialog box opens after you specify the destination file.
| Vector Output Settings |
|---|
|
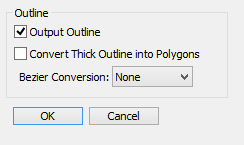
- Output Outline
- Outlines will be exported.
- Convert Thick Outline into Polygons
- Fills outlines that change in thickness. These are exported as vector polygons.
- Bezier Conversion Settings
- Objects with many vertices along connecting lines are converted to Bezier curves.
Select None, Rough, Normal, or Detail.