Brightness Correction
When the Auto Exposure checkbox is selected, the data from the radiosity calculation is converted into the 24-bit RGB color space using certain related parameters before the image is displayed in the Radiosity Window. This conversion is based on a combination of settings and parameters, such as the Diffuse Color and the Texture average color in the Surface window, the Diffuse parameter in the Solution dialog box, and the result of the radiosity calculation, as well as the related parameters. These parameters work together to produce the image so that the color of every pixel fits within the 24-bit color space when the total energy is uniformly allocated to the scene. This function is similar to automatic exposure compensation in conventional cameras. Thus, the image is displayed in the Radiosity Window so that most objects are visible even if the scale or brightness values of some objects are inappropriate. However, the brightness of objects will remain unchanged when the scene contains only one light source and you have modified the brightness of it. For example, with the radiosity feature, you cannot change the brightness of objects in the scene containing multiple light sources by switching on/off one or more of those sources. This limitation can be worked around by calculating radiosity with the Auto Exposure checkbox off or by manually correcting the brightness of the image afterwards.
The color of surface attributes in the radiosity solution can be corrected using the above methods.In either case the image quality is not affected.
Exposure Correction in Radiosity Pro
Exposure correction in Radiosity Pro, included with Shade3D Professional, is adjusted using the Exposure slider at the bottom of the Radiosity Window.
When the Auto checkbox is selected, exposure is automatically adjusted. To accurately see the effects different lighting settings have on a scene, deselect the Auto checkbox. Also, if you display an interior scene containing an opening toward the exterior, the effect of natural light emitted from the opening onto the objects inside will be suppressed, preventing over-brightening of the interior objects.

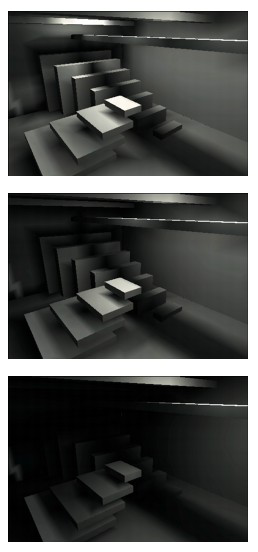
An interior scene containing three area lights. The first shows the scene with all three lights enabled, the second with the two lights near the front enabled, and the third with only one light near the front. Because Auto Exposure is disabled, the third one is underexposed. The three scenes show clearly the different effects of illumination.
The brightness of the scene can be adjusted using the Exposure Correction slider. Increasing the Exposure Correction slider's value by 1 corresponds to double the amount of energy in the scene.