Reference
| FogPlus |
|---|
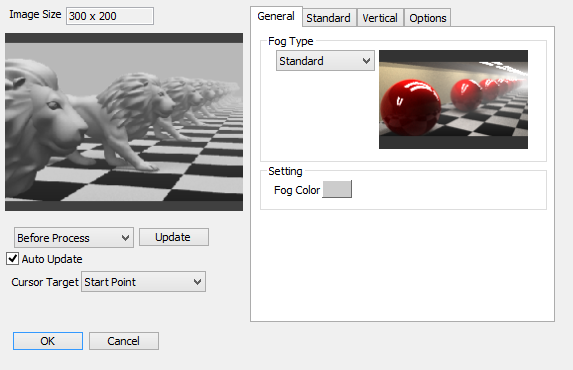
|
- Image Size
- The size of the image saved in the Image window.
- Preview Image
- Displays a preview of the image using the preview type specified in the below pop-up menu.
- Preview Type Pop-up Menu
- The type of preview image displayed in the FogPlus Settings dialog.
- Update Button
- Updates the preview image with FogPlus applied, and sets the Preview pop-up menu to After.
- Auto Update Checkbox
- Updates the preview image with FogPlus applied whenever a FogPlus setting changes.
- Cursor Target Pop-up Menu
- The Standard Fog and Vertical Fog values can be set by choosing the appropriate value from the Cursor Target menu and clicking on the desired position in the preview image. The image must be rendered with the Keep Z checkbox checked.
- Apply Button
- Applies FogPlus to the image when used as a post effect.
- OK Button
- Applies the FogPlus settings to the FogPlus effector on the image.
- Cancel Button
- Cancels the modified FogPlus settings.
- Save Settings
- Save the settings without applying FogPlus to the image, when used as a post effect.
General Tab
Choose the Fog Type and the Fog Color on the General tab.
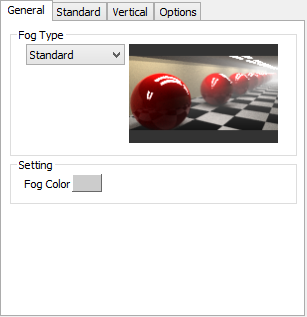
- Fog Type
-
- Fog Type Pop-up Menu
- Standard Fog, Vertical Fog, or Blend Both can be selected for the fog type. Blend will apply both the Standard Fog settings and the Vertical Fog settings simultaneously.
- Settings
-
- Fog Color
- Select the color of fog to apply from the Colorbox.
Standard Tab
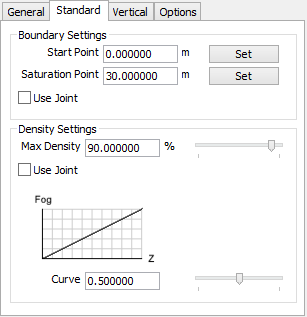
- Boundary Settings
-
- Start Point
- The Start Point is the point at which the FogPlus effect begins, measured from the camera eye point (in meters).
- Saturation Point
- The Saturation Point is the point of saturation, where the FogPlus effect is strongest (measured in meters from the camera eye point).
- [Set] Button
- Click the [Set] button and then click on the preview image to set the value to the clicked position. The image must be rendered with Keep Z checked.
- Use Joint Checkbox
- The FogPlus Controller joints will be used, with any applied animation settings, if this is checked.
- Density Settings
-
- Max Density Textbox and Slider
- The level of the strongest FogPlus effect, reached at the Saturation point. 100% is completely opaque fog.
- Use Joint Checkbox
- The FogPlus Controller joints will be used, with any applied animation settings, if this is checked.
- Curve Textbox and Slider
- The FogPlus Curve value determines how fast the fog effect gets stronger.
- The default value is 0.5, which describes a linear relationship between distance from the camera eye point and FogPlus strength.
A value smaller than 0.5 describes a relationship in which the FogPlus effect becomes dense quickly and then continues to grow in intensity more slowly until the Saturation point.
A value larger than 0.5 describes a relationship in which the FogPlus effect becomes dense slowly and then sharply increases in intensity close to the Saturation point.
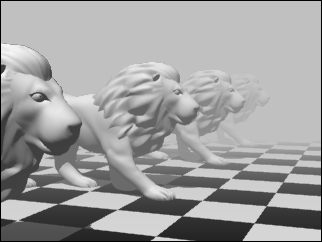
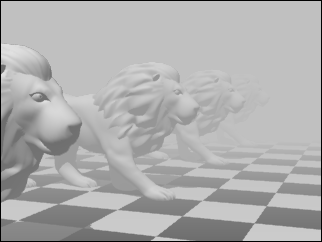
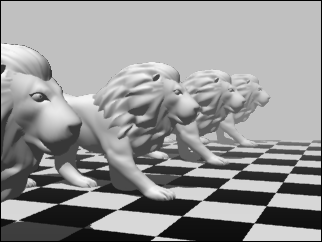
The FogPlus Curve value is set to 0.5, 0.1, and 0.9 from top to bottom, with all other settings the same.
Vertical Tab
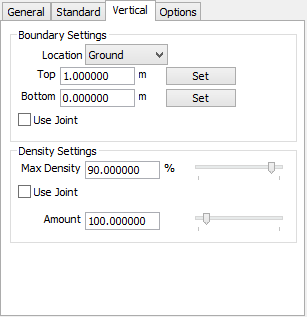
- Boundary Settings
-
- Location Pop-up Menu
- The location at which the Vertical Fog effect begins.
- Top Textbox
- The Top value along the Y axis for Vertical Fog. This is the point at which Ceiling Fog is strongest. If Ceiling is selected in the Location pop-up menu and the camera eye point is above the Top value, no fog will be drawn.
- Bottom
- The Bottom value along the Y axis for Vertical Fog. This is the point at which Ground Fog is strongest.
If Ground is selected in the Location pop-up menu and the camera eye point is below the Bottom value, no fog will be drawn. - Use Joint Checkbox
- The FogPlus Controller joints will be used, with any applied animation settings, if this is checked.
- Density Settings
-
- Max Density Textbox and Slider
- The level of the strongest FogPlus effect, reached at the Saturation point. 100% is completely opaque fog.
- Use Joint Checkbox
- The FogPlus Controller joints will be used, with any applied animation settings, if this is checked.
- Amount Textbox and Slider
- The overall strength of Vertical Fog. Fog will not grow any stronger past the Saturation point.
- This value is not an absolute value; it is relative to the FogPlus effect range determined by the Start Point and Saturation Point.
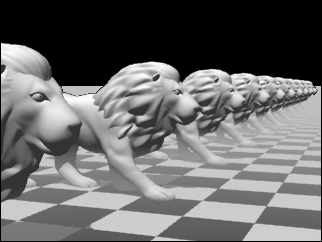
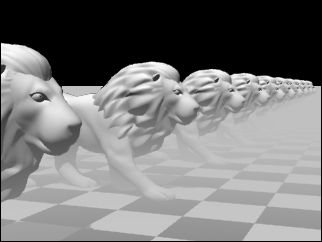
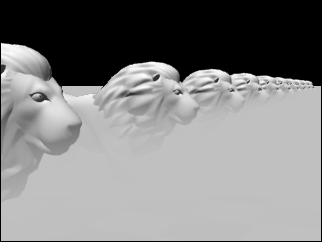
The FogPlus Amount is set to 200, 250 and 300 from top to bottom, using the same FogPlus range values.
Options Tab
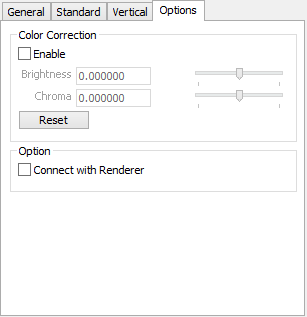
- Color Correction
-
- Enable Checkbox
- Adjust the brightness and chroma settings for the fog. Not supported by Connect with Renderer (see below).
- Brightness Textbox and Slider
- The brightness of the image within the FogPlus range. Enabled when the Use checkbox is checked.
- Chroma Textbox and Slider
- The chroma of the image within the FogPlus range. Enabled when the Use checkbox is checked.
- Reset Button
- Resets the Brightness and Chroma values to 0.
- Option
-
- Connect with Renderer
- When checked, the FogPlus effect will be calculated during rendering for reflective and translucent objects, processes that cannot be done as post-rendering effects.
Please keep in mind the following limitations:
- Only Ray tracing or Path tracing Rendering Methods are supported.
- A perfect preview is not available.
- Vertical Fog is not supported.
- Color correction is not supported.
- ShadeGrid Server is not supported.


