Photo Modeling Reference
Image List
This manages all images.
 Load Image Button
- This button loads images as master image of Shade3D. Loaded images are displayed in the Image List. When you delete loaded images, information set up in the images will be deleted as well.
 Delete Image Button
- This button deletes images selected in Image List and also delete the image from your list of master images in the current Shade3D project. Deleting an image also deletes any associated face and undo information. Face information set up in each image and undo information will be cleared as well.
- Image List List
- This displays loaded images. Selected images appear in the preview area.
Image selected in list box is displayed in preview area which shows up when selecting [modeling] tab on the right side of window.- Generate 3D Checkbox
- When this is on, information of faces assigned in a image that is checked on is used to Generate 3D.
- Master Face Mark
- The appearance of a star * next to an image name means the image is used for creating the Master Face.
Face List Group
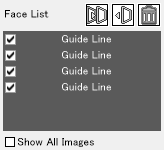
This organizes faces that are assigned or to be assigned to images in the Image List.
 Copy Button
- This button copies a selected face.
 Paste Button
- This button pastes a copied face.
 Delete Button
- This button deletes a selected face.
- Face List List
- This displays an organized list of face information that is associated with each Image.
If you select an item from the Face List, the item appears selected on the Modeling tab.
See alse Face Information Dialog Box
-
- Face List Item Checkbox
- When this is selected, a face can appear in the Preview Modeling tab.
- Face ID Number
- This assigns a ID number starting to each image. Zero [0] is automatically assigned to a Master Face.
- Show All Images Checkbox
- Displays all images.
PhotoModeler Tools
These are tools to place and modify faces.
 Line Button
- Drag to select a line in the Preview tab, or by dragging a selection rectangle. You can select multiple points using the Shift key. You can move a selected face or guide line by dragging it.
 Point Button
- This button selects a vertex or point of a face, or by dragging a selection rectangle. You can select multiple points using the Shift key. You can move a selected vertex by dragging it.
 Select All Button
- Selects all faces in the Preview tab.
 Undo Button
- This button undoes the last action. You can undo up to 100 times . Some actions will clear all levels of undo. These include any modifications in Shade3D browser or when exporting to Shade3D.
 Redo Button
- This button reimplements an undone action. You can redo up to 100 times. All history is cleared when you read in information with the Import from Shade3D button.
 R-Face Button
- When this button is selected, clicking in the Preview tab places vertexes to become the Master Face. When it is selected, a Master Face is selected in the Preview tab . A Master Face must be rect- angle or square . A Master Face must be assigned in all images as well. Accuracy of 3D generation is proportional to the size of a Master Face assigned on the images. When selected, the Create Master Face Group is available.
- Master Face Group
- Face ID is fixed to 0 and the number of vertex is fixed to four on a Master Face. This parameter cannot be changed.

 Face Button
- When selected, clicking in the Preview tab places faces that have [ID] number greater than zero. When it is selected, Create Face Group is displayed.
- Create Face Group

- Number of Vertex pull-down menu
- Select the number of vertex of a face you create: from triangle, quadrangle or polygon. A face is placed when you click the number of vertex you selected in the preview area. You can also place a face by double clicking a mouse or hitting the [Enter] key.
- Specific Face ID pull-down menu
- Assigns a Face as either Unspecified or with a Face ID number.If you select Face ID, it creates a face with the ID number that is specified in Face ID text box. When you place a new face without changing the ID, the previous face is deleted and is replaced with your new face.
 P-Add Button
- This button adds vertexes to an already placed face. Click on a line of an existing face to add new vertexes. When you click a line that is a boundary of multiple faces, vertexes are added to them. In case of a Master Face, you can add up to four vertexes.
 P-Del button
- This button deletes vertexes of an already placed face. Click vertexes of a face to delete vertexes. A vertex is not deleted when the number of vertex becomes three or under after deleting. [Delete Vertex] group is displayed when this button is selected.
- Delete Vertex Group
- Select either [The deletion is confirmed] or [The deletion is not confirmed] to confirm that a vertex is deleted in the pop up menu.
 Delete Button
- Deletes the selected face.
 Reverse Order Button
- This button reverses the order of vertexes of all faces selected in preview area.
 Snap Button
- This button snaps vertexes when placing or moving vertexes while creating faces.
 Start Button
- This button assigns the starting point of vertex that constructs a face. When you select a vertex in preview area after clicking this button, vertexes constructing a face are replaced from the selected vertex as a starting point.
 Face ID Button
- This button changes an ID of a face in preview area. The Change Face ID group is displayed when it is selected.
- Change Face ID Group
- Enter an ID you change in [Change Face ID] text box and press Modify button to change a face ID.

 Info Button
- When this button is selected, the Object Information Group is displayed.
- Object Information Group
- This displays the number of vertexes and a face ID of a selected face in preview area.

 Guide Button
- This button creates supplementary lines used as guides to create faces. To create guide lines, click to points in the Preview tab. These guides also allow for snapping if the snap option is on.
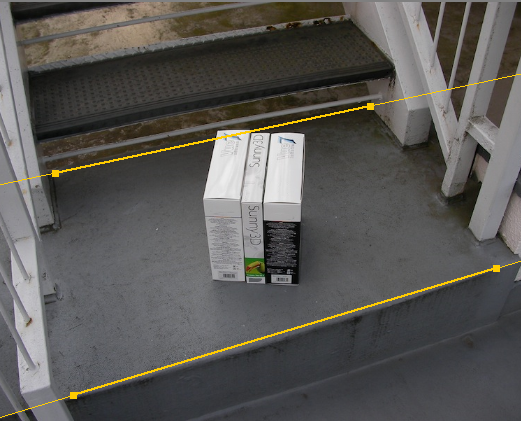
Guide lines do not affect 3D model generation. They are used to help you judge missing points. They provide guides that help you align your faces.
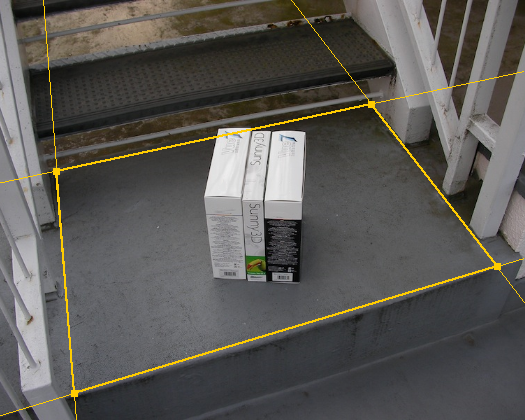
Guide lines are managed in Face List.
 Options Button
- This button assigns size information of a 3D ob- ject to output as polygon mesh of Shade3D. The Output Options group is displayed when you select this button.
- Output Options Group

- Object Size Text Box
- This assigns the length of the longest XYZ direction line of bounding box of the generated object in real numbers.
- Texture Text Box
- This assigns the maximum size of the generated texture map. The default is set to 512 x 512.
Generate 3D Button
This button calculates the geometry and texture map that you can view in the 3D View tab.
Other Options
Set up other options.
- Restore Master Face Check Box
- When this box is on, a Master Face is generated as a face to make up a 3D object at the time of generating a 3D object. When it is off, a Master Face is used to project a 3D object but is not used to generate as a face to make up a 3D object at the time of generating a 3D object.
- Keep this button off when you want to use a Master Face only as a guide. Since the texture of a Master Face is not generated when it is off, the accuracy of other faces texture will be improved.
- Projection After Restore Check Box
- When this box is on, it shows how a face is generated to a 3D object after generating it in red by re-projecting a face from 3D object to a currently displayed image. It tells you that the fewer gaps between a placed face and a displayed face in red are in all images, the more accurately a 3D object is generated. When it is off, the re-projected red line is not displayed.
- Transparency Slider
- This assigns transparency of a selected image. It is used when it is hard to see faces and supplementary lines you place. Assign transparency to each image.
Save and Load Options
- Auto Updates Check Box
- When checked, operations in PhotoModeler are automatically saved in a custom attribute of a part selected in Shade3D browser. When it is suc- cessful to generate a 3D object, it generates the 3D object as polygon mesh in selected part .
 Save to Shade3D Button
- This button saves current set up information as a custom attribute of a part selected in Shade3D browser.
 Load from Shade3D Button
- This button loads configuration from a custom attribute of a part selected in Shade3D browser. Information in PhotoModeler is cleared when an attribute such as a newly created part does not exit.
Modeling Tab
This displays modeling operating area.
- Preview Area
- This displays loaded images, Master Faces, faces, and guide lines.
 Pan
Pan- This scrolls the preview area up and down, right and left. You can also operate this feature by using [space] key + drag in preview area or [arrow] key.
 Zoom
Zoom- This enlarges and reduces preview area. You can also operate this feature by rotating a mouse wheel or using [shift] key + [up and down arrow] key.
 Rotate
- This rotates preview area.
 Reset
Reset- This resets pan, zoom etc. in preview area and displays default settings.
3D View Tab
This displays the 3D view area.
- Preview Area
- This displays a generated 3D objects and grids.
 Pan
Pan- This scrolls preview area up and down, right and left. You can also operate this feature by using [space] key + drag in preview area or [arrow] key.
 Zoom
Zoom- This enlarges and reduces preview area. You can also operate this feature by rotating a mouse wheel or using [shift] key + [arrow] key.
 Rotate
- This rotates a 3D object. You can also operate this feature by using [space] + [shift] key + drag in preview area.
 Reset
Reset- This resets pan, zoom etc. in preview area and displays default settings.
Other
- PhotoModeler Information on the browser
- PhotoModeler information is stored as a custom attribute of a part. A part with a stored custom attribute is labeled with PhotoModeler.
- A generated 3D object is stored as a polygon mesh. There is always one polygon mesh that is stored in a part. When it is changed, it is cleared then stored again.
- Textures of 3D Objects
- Texture images assigned after generating a 3D object is filled into each triangle or quadrangle like tiles in an image.
- When there are polygons, they are placed in the bottom quarter area of a texture . It is efficient to create a face with triangle or quadrangle as much as possible because the more polygons it has, the less efficient it is filled with texture.
- Requirements for Face Creation
- A face requires the same ID on at least two images in order to exist. When an object is not a simple 3D but includes convex shapes, there could be unseen faces due to camera angle. However, it is not necessary to place a face on hidden area when the hidden face is assigned to a face on two or more images.
- A face is not placed in this image because the face in the back is hidden and not be seen.
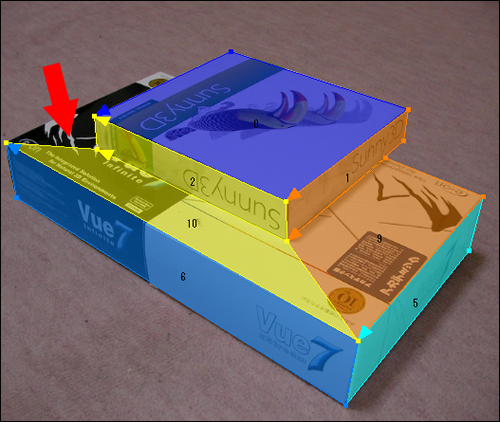
- Faces are placed on hidden faces in two or more different images as below.
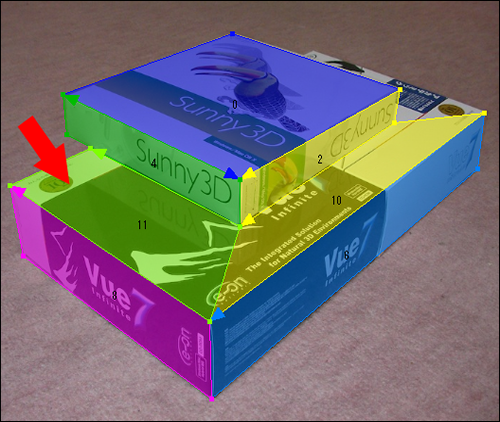
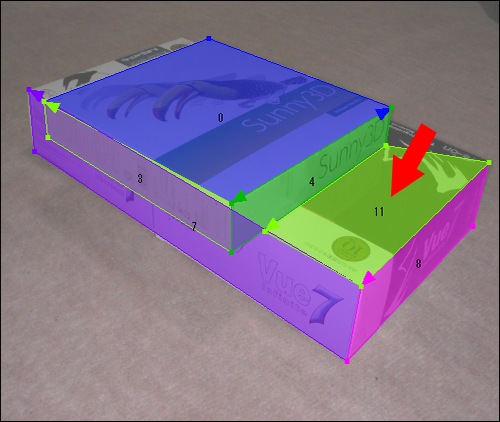
- The hidden face is generated as 3D object as well.
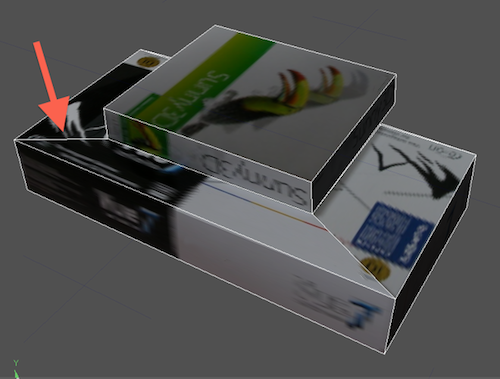
- A face is not placed in this image because the face in the back is hidden and not be seen.