Hair Salon Reference
| Hair Settings |
|---|

|
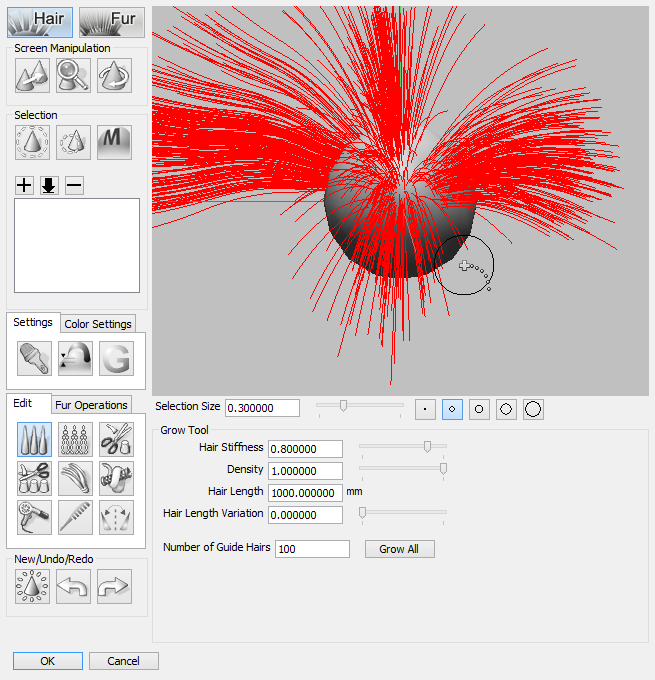
Hair Button
Switch to Hair Mode.

Fur Button
Switch to Fur Mode.

Screen Manipulation Tools

- Move Tool
- Click this button and click and drag in the preview window to move the camera around the object. You can also move the camera at anytime by clicking and dragging while holding down Space.
- Zoom Tool
- Click this button and click and drag in the preview window to zoom the camera in or out. Drag up to zoom in; drag down to zoom out. You can also zoom the camera at anytime by using the mouse wheel.
- Rotate Tool
- Rotates the object in the preview window or rotates the camera eye point centered around the object. You can rotate the view at any time by clicking and dragging while holding down Shift + Space.
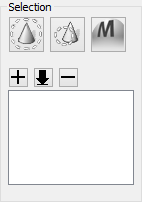
Selection Tools

- Select All Button
- Selects all the hairs in the preview window.
- Area Select Button
- Click in the preview window to select hairs within the specified diameter. You can change the size of the cursor diameter by using the slider or five preset buttons, or enter a specific diameter in the text box.
Hold Shift while using Area Select to add to an existing selection.
Hold Ctrl (Win) or Option (Mac) while using Area Select to add to the existing selection of guide hairs.
Hold Alt (Win) or Command (Mac) while using Area Select to deselect guide hairs. - Add Selection Layer Button
- Adds the currently selected guide hairs in the preview window to a new selection layer. The name Layer is added to the listbox.
- Refresh Button
- If you are working with selection layers, clicking this button will update the listbox to reflect any changes to the selections in the preview window.
- Delete Selection Layer Button
- Deletes the selected layer in the listbox.
- Selection Layers Listbox
- This box lists all the selection layers you have made. Clicking on a layer name in the listbox will select the guide hairs that belong to that layer in the preview window. Double-clicking a layer name will allow you to edit the name. Up to 32 selection layers can be added.
Hair Styling Settings

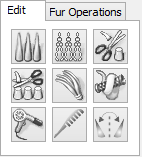
- Grow Tool
- Creates guide hairs of the specified length on the outside surface of the polygon mesh. In the preview window, click and drag to create the guide hairs along the normals of the clicked polygon face. If there are already guide hairs on that face, the new guide hairs are interpolated along the same direction.
Caution If the object has polygon faces flipped inside out, the polygon will appear black in the preview window and the guide hairs will be generated on the inside of the object.
- Clippers Tool
- Deletes the guide hairs at the point where you click and drag in the preview window.
- Cut Tool
- Cuts the guide hairs from the start to the end of the click and drag motion in the preview window. In contrast to the Clippers tool, this does not remove the hair entirely, it only chops the hair off at the line you draw.
- Match Length Tool
- Makes the target guide hairs all one length by shortening them to the length specified in the tool settings . Lengthen Tool Lengthens guide hairs within the cursor diameter.
- Wave Tool
- Adds a wave or curl to the guide hairs within the cursor diameter.
- Arrange Tool
- Adds a virtual "blowdryer" effect with a strength relative to the distance of the click and drag operation.
- Comb Tool
- Pulls intersected guide hairs in the direction of the comb tool.
- Mirroring Tool
- Adds a mirroring effect when you drag to create a guide line; guide hairs are automatically generated on the other side of the guide line.
- Polygon View
- Shows the selected guide hairs as polygons. When doing operations in the preview window the guide hairs are shown in wireframe mode.
- Undo/Redo Buttons
- The Undo and Redo buttons are available for selecting, editing and adding color operations done on guide hairs . Moving or rotating the camera, zooming in and out, or editing the selection layers cannot be undone .
- Maximum Number of Hair
- The maximum number of hairs for the object as a whole when in Fur Mode.
- Polygon Width
- Adjusts the ratio of width to height of the guide hairs when converting them to polygons. The maximum is 10.
- Number of Guide Hairs
- Adjusts the number of guide hairs displayed in the preview window. This is also the number of polygons that will be created from the guide hairs if Convert Hair to Polygons is used.
NoteA very high number of guide hairs may slow down the preview.
- Show Wireframe
- Displays each guide hair polygon using Shading and Wireframe mode.
- Apply Texture to All Enables the hair textures listed as thumbnails in the box below to be applied to all of the selected guide hairs when clicked.
- Hair Textures Box Displays the image textures available from the Surface Window. Up to 16 textures can be used at once.
- Scroll Buttons
- These buttons scroll the Hair Textures box left and right when there are too many textures listed to display at once.
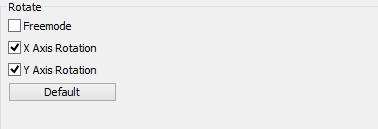
- Freemode
- When checked, the object in the preview window will rotate. When off, the camera eye point will rotate around the object.
- X Axis Rotation
- Enables rotation about the X axis.
- Y Axis Rotation
- Enables rotation about the Y axis.
- Return to Default Button
- Returns the camera angle to the default view.
- Hair Stiffness
- Measures how easily the hair is affected by gravity.
- Density
- Sets the density of the guide hairs. This is not the density of the hair itself and does not affect rendering.
- Hair Length
- Sets the physical length of the hair in millimeters (mm).
- Hair Length Variation
- Sets the small difference in hair length.
- Number of Guide Hairs
- Sets the number of guide hairs displayed in the preview window.
- Grow All Button
- Generates guide hair on all the polygon faces using the specified Grow settings. The number of guide hairs generated is specified in the Number of Guide Hairs textbox.
- Strength
- Measures the speed at which guide hairs are removed using the Clippers tool.
- Freehand
- Switches to Freehand mode, in which guide hairs inside the cursor diameter are cut (erased) immediately, without the need to click and drag across the line you wish to cut.
- Hair Length Variation
- Sets the difference in hair length left when cutting.
- Freehand
- Switches to Freehand mode, in which guide hairs inside the cursor diameter are matched to the same length.
- Hair Length
- The length, in millimeters, to which the guide hairs are trimmed when using the Match Length tool. Values larger than the current length of a guide hair will leave it unaffected.
- Hair Length Variation
- Sets the difference in hair length left when lengthening the hair.
- Hair Length
- The length, in millimeters, the hair is lengthened when clicking and dragging with the Lengthen tool once.
- Lengthen Selected Hair Button
- Clicking this button lengthens all the selected guide hairs to the length specified in the Hair Length textbox.
- Strength
- Sets the amount of wave or curl applied to guide hairs when using the Curl tool. To straighten wavy hairs, set the Strength to 0 and use the Curl tool.
- Size
- Sets the size of the curls applied using the Curl tool.
- Curl Variation
- Sets the amount of variation in the curls applied using the Curl tool.
- Strength
- Sets the strength of the "blowdryer" force applied to guide hairs using the Arrange tool.
- Preview Box
- The preview box show what the hair textures will look like based on the texture and color settings. The roots of the hair are shown at the top of the preview, while the ends are shown at the bottom.
- Size
- The size of the texture in pixels. Select 128x256, 256x512, 512x1024 or select Custom to specify a different size.
- Width
- Select Custom in the Size pop-up menu to enable this field. Specifies the width of the texture image in pixels.
- Height
- Select Custom in the Size pop-up menu to enable this field. Specifies the height of the texture image in pixels.
- Number of Textures
- Multiple textures can be applied to hair to give it a more natural look.
- Layers Box
- Displays the textures layers. Up to 5 layers are possible. Turning off the checkbox next to each layer name will cause that layer to not be drawn.
- Add Layer Button
- Adds a new texture layer.
- Delete Layer Button
- Deletes the selected layer.
- Gradation Bar
- Describes the color gradation of the current texture. Click anywhere on the bar to add a new color marker. Markers can be moved up or down to change the color gradation. To delete a marker, click and drag it to the left or right, away from the gradation bar. The end markers cannot be deleted.
- Color Markers
- Each color marker represents one color. Their position along the gradation bar describes the color gradation.
- Color Box
- Sets the color of the currently selected color marker.
- Density
- Sets the density of the hair texture using a value between 0 and 1.0.
- Hair Length Variation Slider and Textbox
- Sets the variation in length of the hairs using a value between 0 and 1.0.
- Color Variation
- Sets the variation in color between individual hairs.
- Wave
- Sets the amount of wavyness of the hair using a value between 0 and 1.0.
New/Undo/Redo Buttons

Tool Settings
Rotate Group
