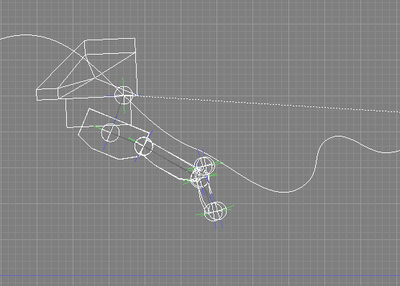
SmartKinematics Settings
SmartKinematics works together with inverse kinematics (referred to as IK below) to make it easier to pose and animate objects with complex joint structures. SmartKinematics provides a powerful way to reproduce complex movements, such as for people, animals, or machines with lots of connected joints.
Warning SmartKinematics is included with Shade3D Standard and Professional.
Attribute Settings
When using SmartKinematics, it's necessary to set the attributes appropriately for joints using IK.
Applying Attributes to Joints
- In ShadeExplorer, under Presets and in the Documentation - Supplemental Manual folder, find "smartkinematics01_setup.shd" and open it.
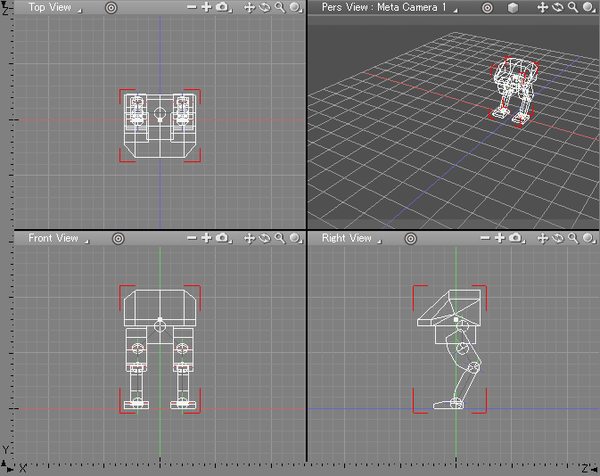
- If the Browser is not open, select View > Browser to display it now.
- Select View > SmartKinematics.
The SmartKinematics Window opens.
SmartKinematics 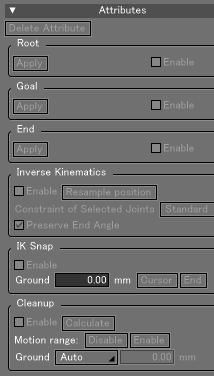
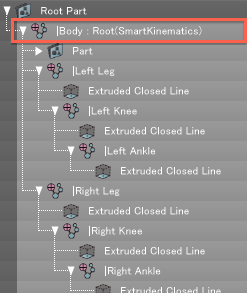
- Select the "|Body" joint, and in the SmartKinematics Window, under the Root group, click the Apply button.
The Root attribute is applied to the "|Body" joint, and "|Body : Root(SmartKinematics)" is displayed in the Browser.
SmartKinematics 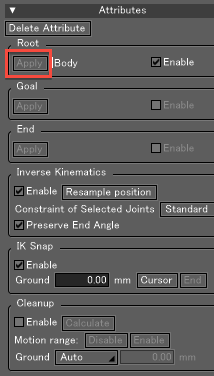
- Select "|Left Ankle" and "|Right Ankle" simultaneously, and in the SmartKinematics Window, under the Goal group, click the Apply button.
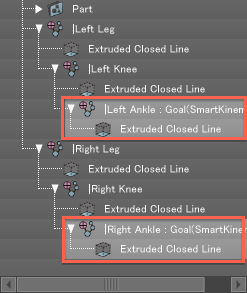
The Goal attribute is applied to both the "|Left Ankle" and "|Right Ankle" joints, and "|Left Ankle : Goal(SmartKinematics)" and "|Right Ankle : Goal(SmartKinematics)" are displayed in the Browser.
SmartKinematics 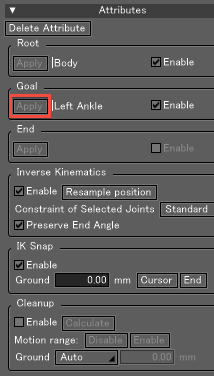
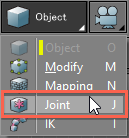
- With the "|Body: Root(SmartKinematics)" joint selected, switch the Editing Mode to Joint mode (by clicking on the Editing Mode button on the left side of the control bar). Drag the manipulator controls to move the joint.
The positions of the "|Left Ankle" and "|Right Ankle" joints are constrained, and the robot's ankles always face toward their original positions (where the constraints were applied).
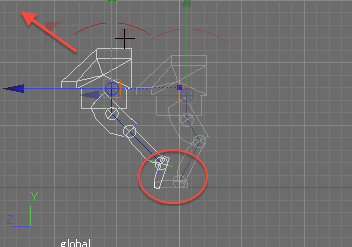
- Select Edit > Undo to undo the operation.
- On the Part tab of the Toolbox, choose Ball Joint, and create two ball joints for each foot, one at the toes and one at the heel.
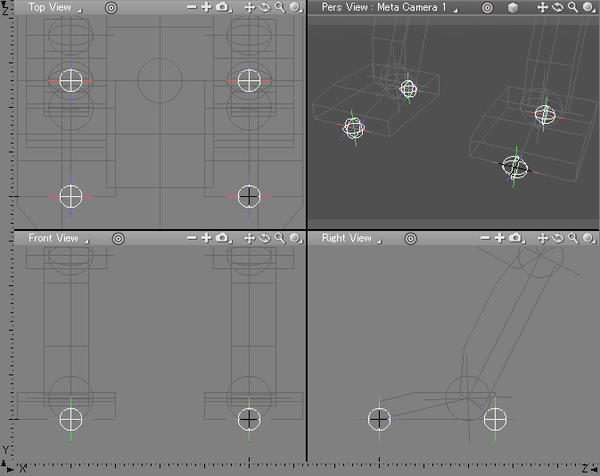
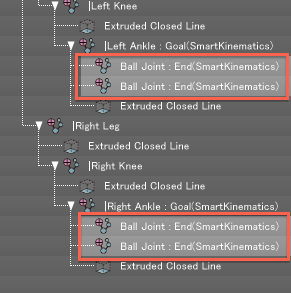
- In the Browser, place the ball joints you created in the following locations.
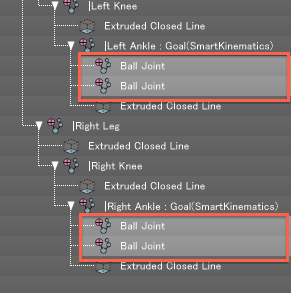
- Select all four ball joints you placed inside "|Left Ankle : Goal(SmartKinematics)" and "|Right Ankle : Goal(SmartKinematics)" and in the SmartKinematics Window, in the End group, click the Apply button.
The End attribute is applied to the ball joints, and "Ball Joint : End(SmartKinematics)" is displayed in the Browser.
SmartKinematics 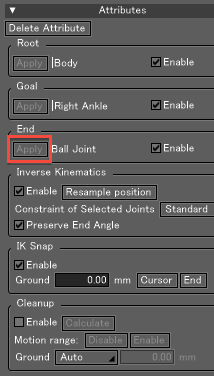
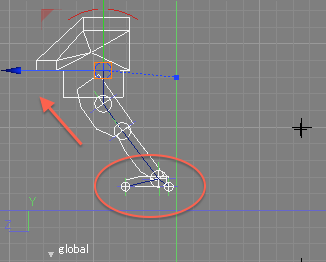
- With the "|Body: Root(SmartKinematics)" joint selected, switch the Editing Mode to Joint mode, and click and drag the manipulator controls to move the joint.
The "|Left Ankle : Goal(SmartKinematics)" and "|Right Ankle : Goal(SmartKinematics)" joints are constrained, and the positional relationship between the toe and ankle of each foot is preserved when the robot moves.
- Select Edit > Undo to undo the operation.
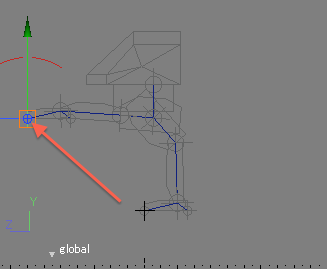
- Select the "Ball Joint : End(SmartKinematics)" in the toe of the left foot, switch the Editing Mode to Joint, and click and drag the manipulator controls.
The robot's body is "pulled" toward the ball joint in the left toe.
In the descriptions below, joints with the Root, Goal, and End attributes applied are each referred as root joints, goal joints, and end joints, respectively.
Deleting Attributes
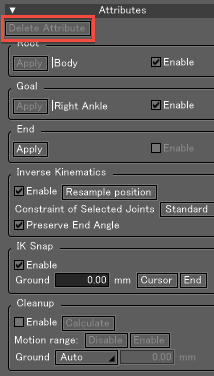
To delete attributes from joints, select the joint whose attributes you wish to delete, and click the Delete Attribute button in the SmartKinematics Window.
| SmartKinematics |
|---|
|
If you wish to apply a different attribute to a joint with attributes already set, first delete the old attribute and then apply the new attribute.
Inverse Kinematics Advanced Settings
With SmartKinematics, you can adjust the behavior of IK depending on your needs.
Controlling Joint Constraints
There are several methods of controlling the IK constraints of goal joints.
This function does not affect the behavior when offsetting the IK chain as a whole. Let's look at the differences in behavior between each of the methods below.
- In ShadeExplorer, under Presets and in the Documentation - Supplemental Manual folder, find "smartkinematics02_snap.shd" and open it.
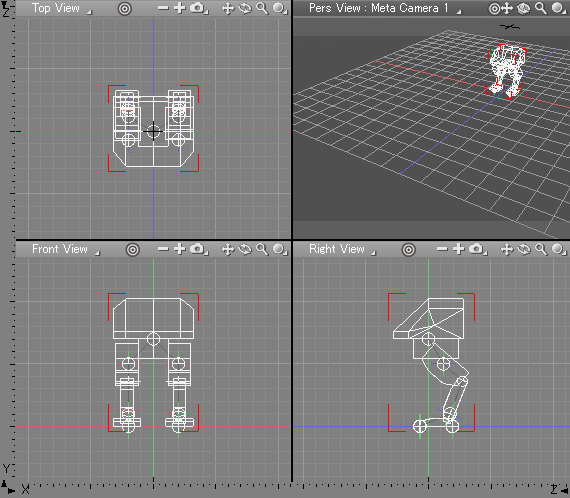
- Select View > SmartKinematics to open the SmartKinematics Window. If the Browser is not open, select View > Browser to display it now.
- In the Browser, select everything except the Root Part, and in the SmartKinematics Window check the Enable checkbox in the Inverse Kinematics group. Next, in the Constraint of Selected Joints pop-up menu, select Standard.
SmartKinematics 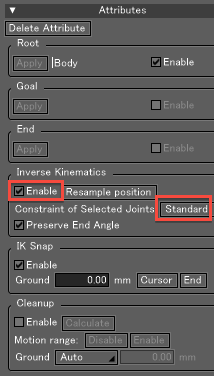
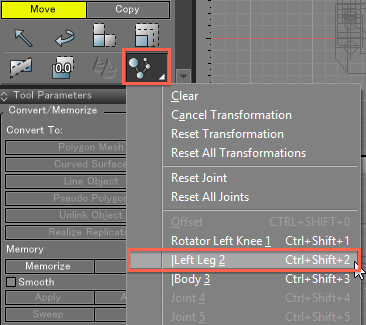
- With "Left Knee" selected, in the Create tab of the Toolbox click the Move button. From the Joint Operation pop-up menu, select "|Left Leg."
- IK constraints are applied to the ankle, and the movement of the knee and thigh are constrained by the position of the toe and heel.
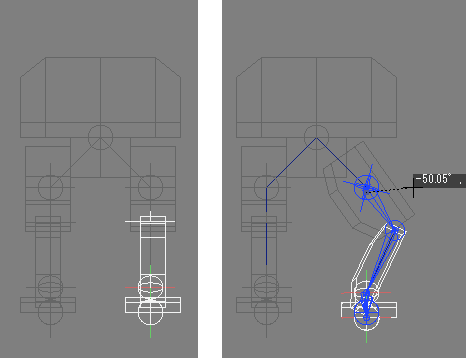
- Select Edit > Undo to undo the operation.
- Next, in the Constraint of Selected Joints pop-up menu in the SmartKinematics window, select Half.
SmartKinematics 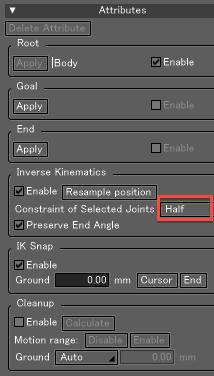
- With the "Left Knee" joint selected, in the Create tab of the Toolbox click the Move button. From the Joint Operation pop-up menu, select "|Left Leg."
The movement of the knee and thigh are unrestricted, but below the ankle the original angle between the toe and heel is preserved.
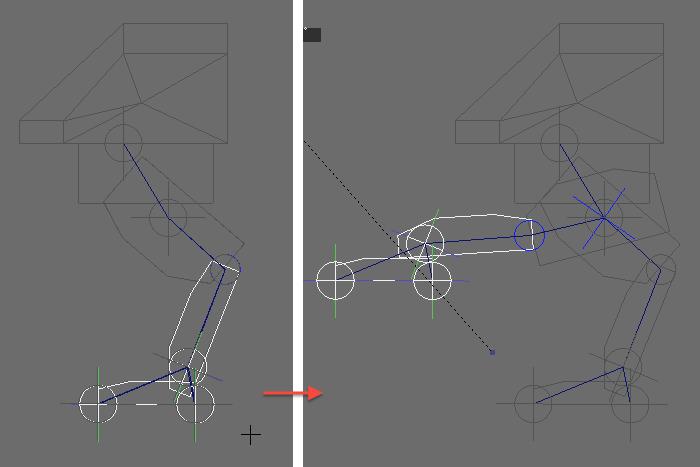
- Select Edit > Undo to undo the operation.
- Next, in the Constraint of Selected Joints pop-up menu in the SmartKinematics window, select Free.
SmartKinematics 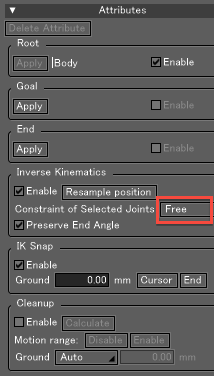
- With the "Left Knee" joint selected, in the Create tab of the Toolbox click the Move button. From the Joint Operation pop-up menu, select "|Left Leg."
The movement of the knee and thigh is unrestricted, and below the ankle is fixed.
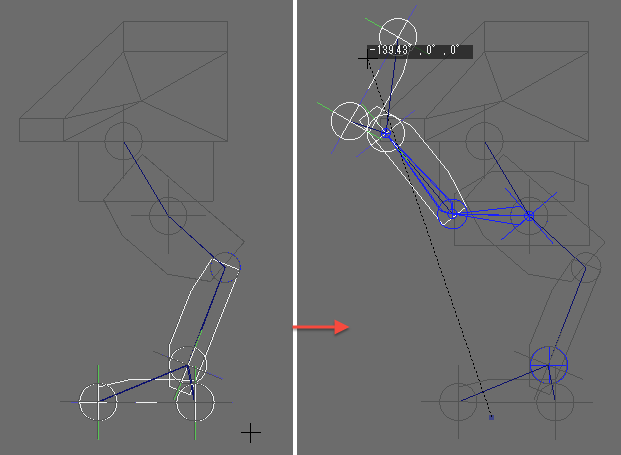
Preserving the End Angle
When you don't wish to preserve the original position of the end joint, such as when animating the feet of a walking figure, you can still specify how the joints under the goal joint will move.
Let's look at the difference in behavior between maintaining and not maintaining the same end angle.
- In ShadeExplorer, under Presets and in the Documentation - Supplemental Manual folder, find "smartkinematics02_snap.shd" and open it.
- Select View > SmartKinematics to open the SmartKinematics Window.
If the Browser is not open, select View > Browser to display it now. - In the Browser, select everything except the Root Part, and in the SmartKinematics Window check the Enable checkbox in the Inverse Kinematics group. Next, check the Preserve End Angle checkbox.
SmartKinematics 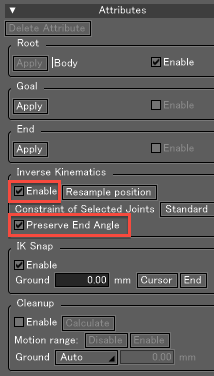
- With the "|Body: Root(SmartKinematics)" joint selected, switch the Editing Mode to Joint mode, and click and drag the manipulator controls to move the joint.
Independent of the body's movement or rotation, the ankle moves in a way that preserves the angle of the foot.
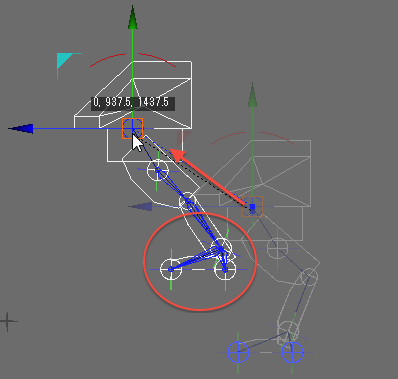
Important In order to preserve the end angle, two or more end joints are required.
- Select Edit > Undo to undo the operation.
- Now deselect the Preserve End Angle checkbox in the Inverse Kinematics group of the SmartKinematics Window.
SmartKinematics 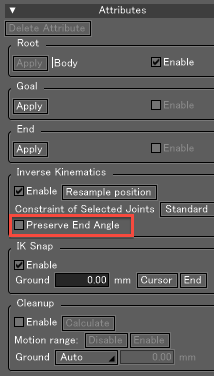
- With the "|Body: Root(SmartKinematics)" joint selected, switch the Editing Mode to Joint mode, and click and drag the manipulator controls to move the joint.
When the foot leaves the ground, the ankle joint faces in the direction of the toe and heel's original positions.
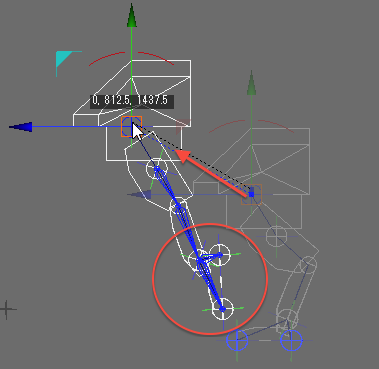
IK Snap
IK Snap is used to automatically adjust the IK and snap the end joint to the ground when it is within a certain tolerance. The tolerance (height above the ground) can be specified to a value of your choice. IK Snap is helpful when animating a walking motion in which accurate contact with the ground is important.
IK Snap is enabled when either Inverse Kinematics is disabled (the Enable checkbox is not selected) or when the Constraint of Selected Joints pop-up menu is set to Free.
- In ShadeExplorer, under Presets and in the Documentation - Supplemental Manual folder, find "smartkinematics02_snap.shd" and open it.
- Select View > SmartKinematics to open the SmartKinematics Window.
If the Browser is not open, select View > Browser to display it now. - In the Browser, select everything except the Root Part, and in the SmartKinematics Window deselect the Enable checkbox in the Inverse Kinematics group.
- Select the "|Body : Root(SmartKinematics)" joint or an object below it in the hierarchy, and in the SmartKinematics Window confirm that the Enable checkbox in the IK Snap group is checked.
SmartKinematics 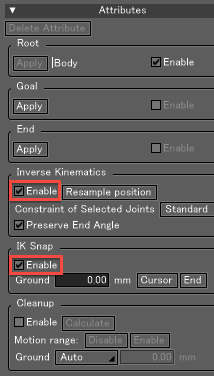
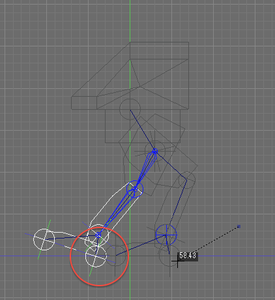
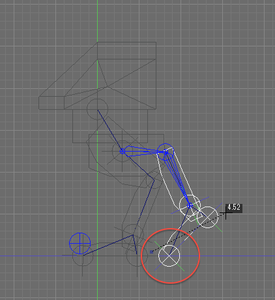
- With the "Left Knee" joint selected, in the Create tab of the Toolbox click the Move button. From the Joint Operation pop-up menu, select "Left Knee" and click and drag in the Figure Window to move it.
When the end joint positioned in the toe and heel comes within a 1/2 grid unit of the ground, it is snapped to the level of the ground.
- Select Edit > Undo to undo the operation.
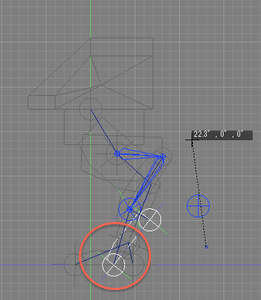
- With "Left Ankle" selected, in the Create tab of the Toolbox click the Move button. From the Joint Operation pop-up menu, select "Left Ankle" and click and drag in the Figure Window to move it. The rotation of the knee and thigh are adjusted so that either the toe or heel end joint (whichever is closest) is always touching the ground.
Correcting Unnatural Animation
The Cleanup function is used to correct unnatural walking motion (where the feet seem to 'slip') caused by interpolation between motion points.
In order to calculate the correct position offset for correcting the animation, the Cleanup function must be run (via the Calculate button in the SmartKinematics Window) after setting up the animation. If you modify the animation after running Cleanup, run it again to update the calculation.
- In ShadeExplorer, under Presets and in the Documentation - Supplemental Manual folder, find "smartkinematics03_cleanup.shd" and open it.
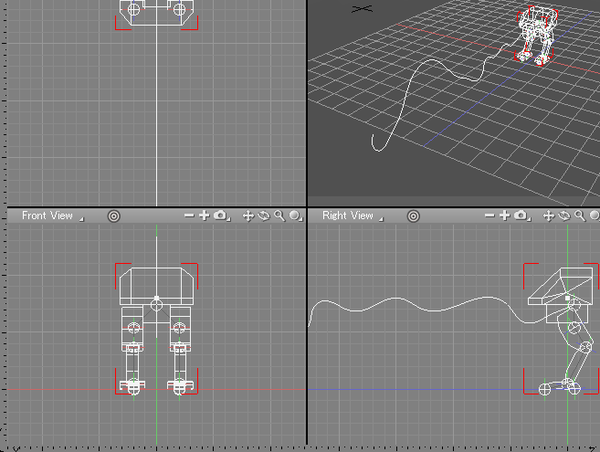
- Select View > SmartKinematics to open the SmartKinematics Window. If the Browser is not open, select View > Browser to display it now.
- Select the "|Body : Root(SmartKinematics)" joint, and in the SmartKinematics Window confirm that the Enable button in the Cleanup group is unchecked.
SmartKinematics 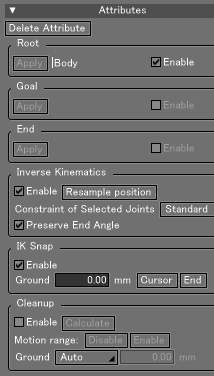
- Open the Motion Window by selecting View > Motion.
- Click the Play button
 in the Motion Window to preview the animation. You can see that between motion points the feet slip and sink below the ground plane.
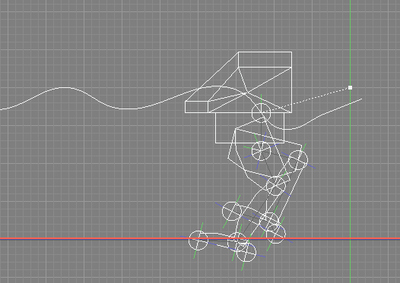
- Now click the Enable button under Cleanup in the SmartKinematics Window.
SmartKinematics 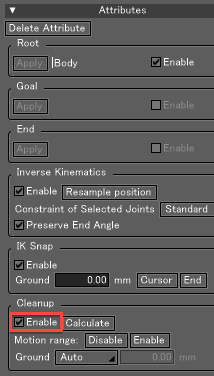
- In the Motion Window, select all the motion points.
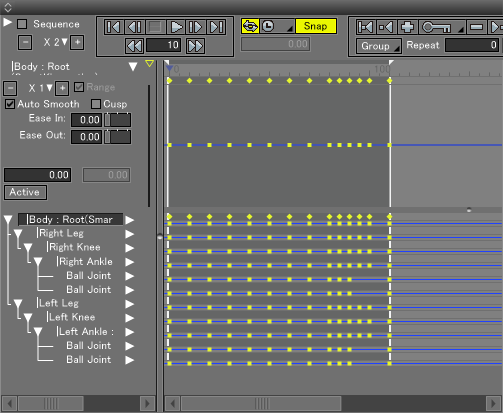
- In the SmartKinematics Window, click the Calculate button under Cleanup.
SmartKinematics 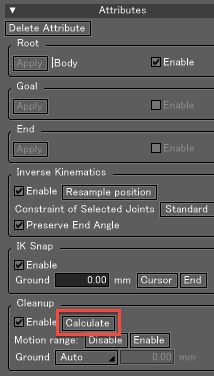
- Click the Play button in the Motion Window to preview the animation. The positions of the feet are constrained, and they no longer 'slip.'
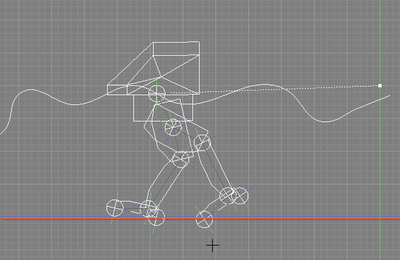
However, we can see that the jumping animation now looks strange.
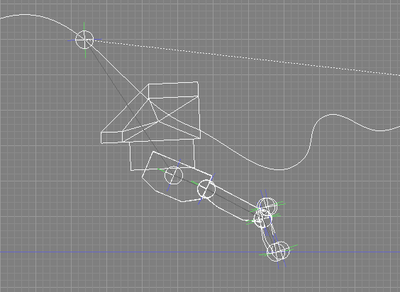
- In the Motion Window, select motion points 10-12 (frames 85-95) where the jump begins.
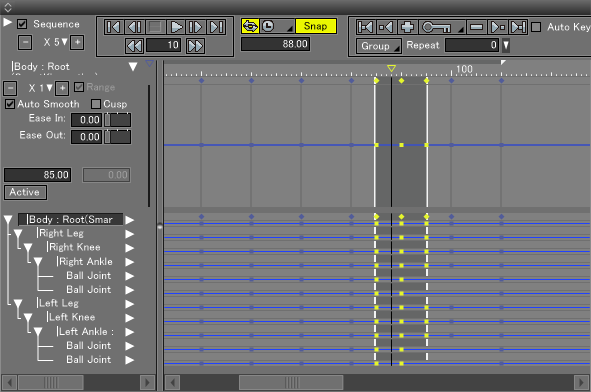
- In the SmartKinematics Window, click the Disable button in the Cleanup group.
SmartKinematics 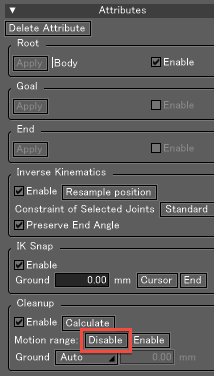
- Click the Play button in the Motion Window to preview the animation again. The constraints are not applied for the duration in which we disabled Cleanup, and the movement looks correct from beginning to end.
