Creating Movie Files
- Animation Rendering Steps
- In ShadeExplorer, under Presets and in the Documentation - Supplemental Manual folder, find "animation.shd" and open it.
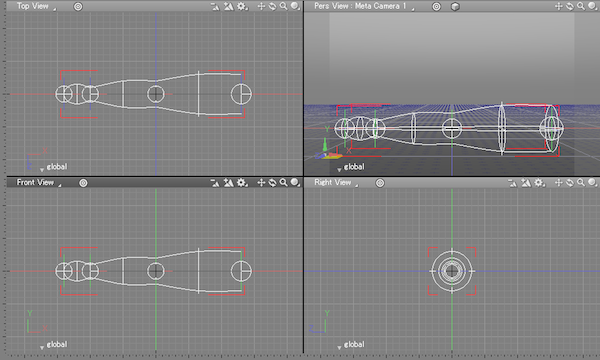
The animation settings are already complete.
To create a movie file, we will render the animation.
- Before rendering the animation, let's take a look at the Rendering Settings.
Select Rendering > Rendering Settings to open the Rendering Settings in the Image Window.
The available settings are exactly the same for both rendering still images and rendering animations.
On the Image tab, set the Width and Height to 160 and 120 respectively.
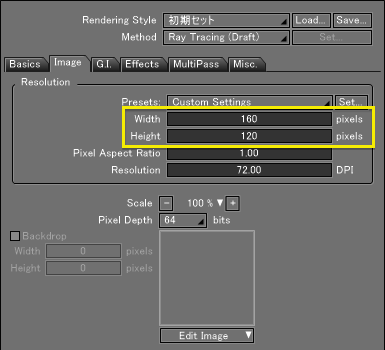
If the size of the rendered images is too large the movie file may not play smoothly, so we use a smaller size here.
- Open the Motion Window by selecting View > Motion.
Open the Animation Settings by clicking the Animation Settings Show/Hide button in the Motion Window.
Motion 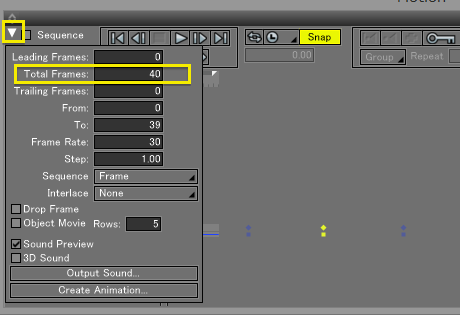
- Enter 40 in the Total Frames text box.
The value entered here is the number of frames to be rendered. The other settings can be left at their defaults.
- After applying the settings, select Rendering > Create Animation...
A Save as dialog box opens.
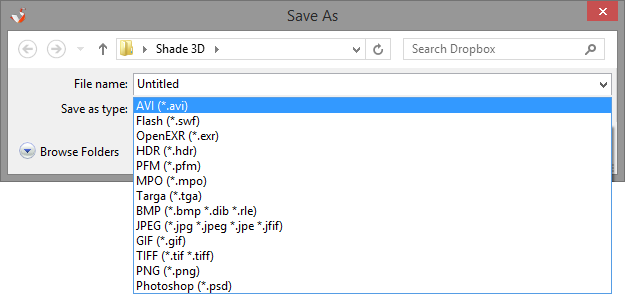
Select the type of movie file to create from the file type pop-up menu.
Movie file formats include AVI (.avi) (Windows), Movie (.mov), and Flash (.swf).
Selecting an image file format available from the file type pop-up menu will export the animation as a sequential file.
Specify the location to save the movie file and enter the file name.
Important The Movie file format (.mov) is not available on 64bit versions. In order to render an animation in .mov format, use a 32bit version.
- Clicking the Save button then opens a Compression Settings dialog box appropriate for the specified file format.
If Flash (.swf) was selected, the FlashExporter dialog box opens.
See also FlashExporter
Important The Movie file format (.mov) can only be used on systems with QuickTime installed separately.
- Compression Settings
- QuickTime Compression Settings
- If QuickTime (.mov) was selected for the movie file format, a Compression Settings dialog box opens.
-
Movie Settings 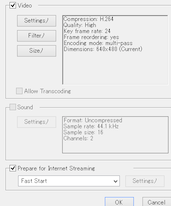
-
Standard Video Compression Settings 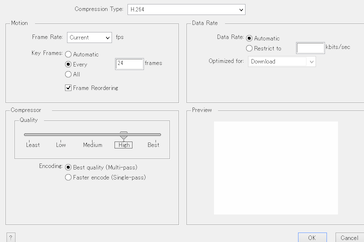
- Select the compression method from the Codec pop-up menu.
- Adjust other settings as necessary.
Select an appropriate codec (compression method) based on how the movie file will be used.
- AVI Compression Settings
- If AVI (.avi) was selected for the movie file format, a Video Compression dialog box opens.
-
Video Compression 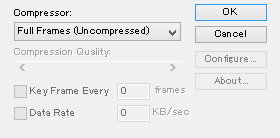
- Select the compression method from the Codec pop-up menu.
- Adjust other settings as necessary.
Select an appropriate codec (compression method) based on how the movie file will be used.
- Click the OK button to start rendering the animation.
During animation rendering, the number of the current frame being rendered along with the total number of frames is displayed in the title bar of the Image Window. The frame number starts at 0. Here we set the total number of frames to 40, so frame numbers from 0 to 39 will be rendered.
- File Playback
Once the animation has finished rendering, try playing the created movie file.

If you have a movie player installed, double-clicking the movie file will play it using the default player.