AimConstraints
AimConstraints allow you to restrict, or constrain, the orientation of an object so that it always faces toward a target object. Using AimConstraints allows you to precisely control animation and posing of complexly jointed objects. By assigning the AimConstraint target to the camera, you can create an animation in which an object is constantly facing the camera, for example. If you have a tree texture applied to a flat surface, the surface can be set to always face the camera, so the camera angle does not hide the texture.
Note AimConstraints is included with Shade3D Standard and Professsional.
Targeting an Object
First you will need to assign the AimConstraint target to an object.
Creating the Target
- In ShadeExplorer, under Presets and in the Documentation - Reference Manual, find "aimconstraints.shd" and open it.
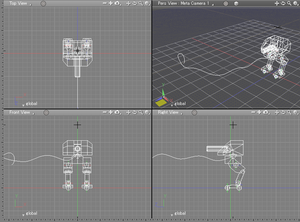
- If the Browser is not already open, select View > Browser to display it now.
- Select "| Turret" in the Browser.
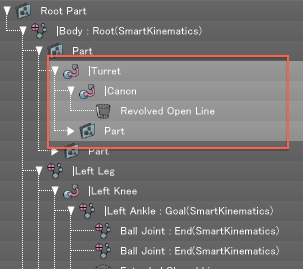
- From the Toolbox, choose Part > Plugins > AimConstraints Target.
The Create AimConstraints Target dialog box appears.
>AimConstraints Target 
- Verify that the box labeled "Create object out of IK end joint," is unselected, and then click OK.
- In the Figure Window, position the 3D cursor at the nose of the turret and click.
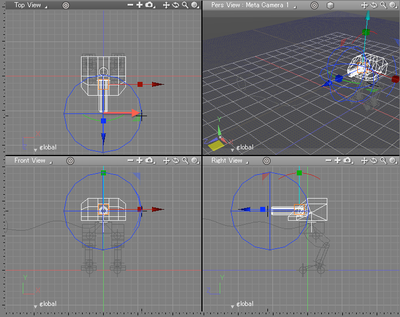
The AimConstraints target is assigned to the "Turret" object, and "AimConstraints" is appended to the object's name in the Browser.
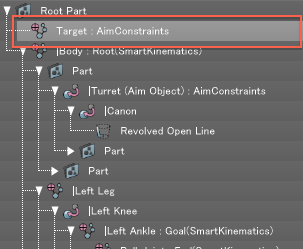
Furthermore, a ball joint has been created below the turret part in the Browser. The name "Target : AimConstraints" is shown.
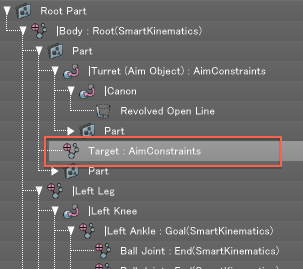
- Select "Target : AimConstraints" in the Browser.
- Switch from Edit Mode to Joint Mode, and drag the Manipulator to move the Target: AimConstraints object.
The turret moves in the direction you drag the mouse.
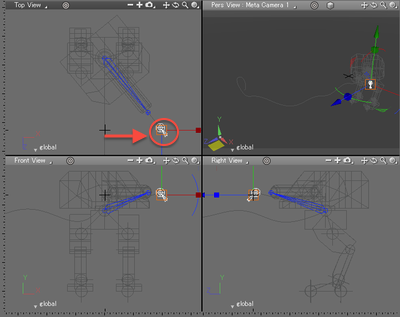
Because the "Turret : AimConstraints" joint is a Y axis rotator joint, it is best moved by dragging the mouse in the Top view. - Select Edit > Undo to return the rotator joint to its original position, and in the Browser, move the "Target : AimConstraints" part to outside the "Body : Root(SmartKinematics)" joint.
- Select the "Body : Root(SmartKinematics) joint."
- Switch from Edit Mode to Joint Mode, and click and drag the Manipulator to move the joint.
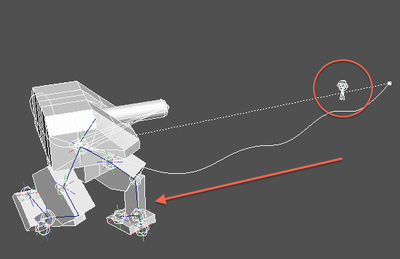
You can see that as the body moves, the turret stays pointing toward the target.
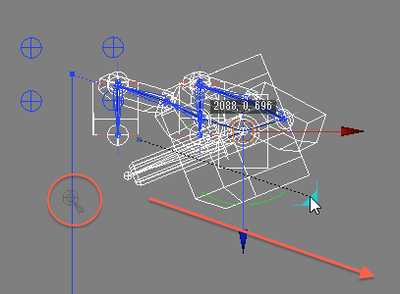
Because the "Turret : AimConstraints" joint is a Y axis rotator joint, it is best moved by dragging the mouse in the Top view. - Open the Motion Window by selecting View > Motion.
- Click the Play button in the Motion Window to preview the animation.
Verify that the turret moves to face the direction of the target.
Deleting the Target
The AimConstraints target is removed by deleting the target ball joint.
- In the Browser, select "Target : AimConstraints."
- Select Edit > Delete to delete the ball joint.
- AimConstraints is deleted from the robot, and the turret name in the Browser returns to "Turret."
Assigning an AimConstraints Target in the Browser Hierarchy
- In ShadeExplorer, under Presets and in the Documentation - Reference Manual, find "aimconstraints.shd" and open it.
- If the Browser is not already open, select View > Browser to display it now.
- Select "| Turret" in the Browser.
- From the Part tool in the Toolbox, choose "Aim Target."
The Create AimConstraints Target dialog box appears. - Check the "Create object out of IK end joint" checkbox and then click OK.
>AimConstraints Target 
- In the Figure Window, position the 3D cursor at the nose of the turret and click.
The AimConstraints target is assigned to the "Turret" object, and "AimConstraints" is appended to the object's name in the Browser.
Furthermore, a ball joint has been created inside (i.e. child to) the turret part in the Browser. The name "End : AimConstraints" is listed.
Furthermore, a ball joint has been created below the turret part in the Browser. The name "Target : AimConstraints" is shown.
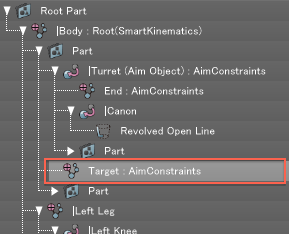
- In the Browser, move the "End : AimConstraints" part to within the "Cannon" joint, and move the "Target : AimConstraints" part to outside the "Body : Root(SmartKinematics) joint.
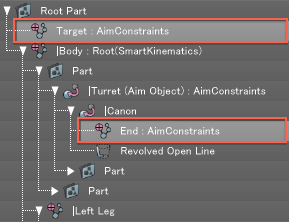
- Check that "Target : AimConstraints" is selected in the Browser.
Switch from Edit Mode to Joint Mode, and drag the Manipulator to move the Target: AimConstraints object.
The turret and cannon follow the target as you drag the mouse.
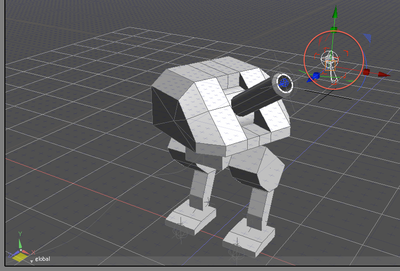
Because the "Turret : AimConstraints" joint is a Y axis rotator joint, it is best moved by dragging the mouse in the Top view.
The Cannon joint is a Z axis rotator joint, so it is best moved in the Front or Right views.
Tip Clicking "Cont. Mode" in the Toolbox enters Continuous Mode, allowing you to perform an operation such as Offset multiple times without having to reselect the tool.
- Open the Motion Window by selecting View > Motion.
- Click the Play button in the Motion Window to preview the animation.
Verify that the turret and cannon move to face the direction of the target.
Targeting a Camera
First you will need to assign the AimConstraint target to a camera. Then you can confirm that the movement is executed correctly.
Whichever camera is currently selected in the Camera window will be set as the AimConstraint target.
Setting the Target
- Select File > New to open a new scene.
- If the Browser is not already open, select View > Browser to display it now.
- Choose "Rotator" from the Part tool in the Toolbox, and click in the Front view to create a Y-axis rotator joint.
- With "Rotator" selected in the Browser, choose "Rectangle" from the Create tool in the Toolbox. Create the rectangle around the rotator in the Front view of the Display window, as shown below.
Verify that the rectangle (listed as "Closed line" in the Browser) is inside (child to) the rotator joint.
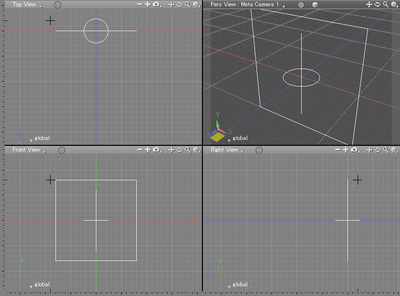

- Now select the "Rotator" joint in the Browser.
- From the Custom tool in the Toolbox, choose "AimConstraints Camera Attributes."
The AimConstraints Camera Attributes dialog appears.
AimConstraints Camera Attributes 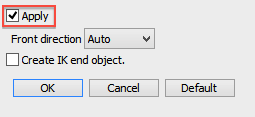
- Check the "Apply" checkbox and click OK.
In the Figure Window, a wireframe appears showing the direction of the camera.
In the Browser, "Aim Camera : AimConstraints" has been appended to the "Rotator" joint.
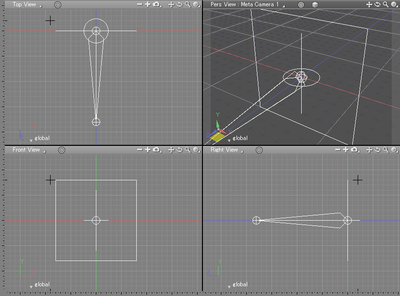

- In either the Figure Window or the Camera Window, move the camera around, and then release the mouse button.
The rectangle moves to face toward the camera.
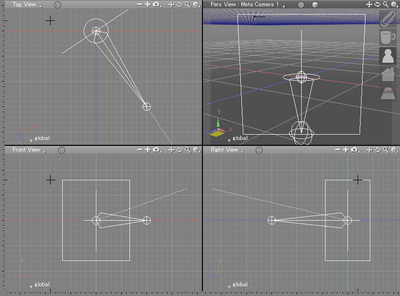
See also Using the Camera
Deleting the Target
The camera target can be deleted from the Custom Info.
- First select the "Rotator (Aim Camera) : AimConstraints" part in the Browser.
- From the Custom tool in the Toolbox, choose "AimConstraints Camera Attributes."
The AimConstraints Camera Attributes dialog appears. - Deselect the "Apply" checkbox and click OK.
The Camera Target should be deleted, and the name of the rotator joint in the Browser returns to simply "Rotator."