Bone Joint Information
These settings are displayed when a bone joint is selected.

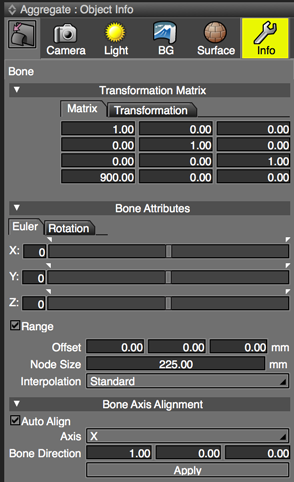
Transformation Matrix Settings
The transformation matrix with bone position and rotation information.The role of this is similar to the Part Attribute Matrix of ball joints and rotator joints, but the Bone transformation matrix determines everything about the position and rotation of a Bone itself.
The position and rotation specified here are the values when the Joint Offset and Rotation are set to 0.
Bones do not have a Part Attribute Matrix or Position parameters.
Caution Reset Transformation and Reset All Transformations will not affect bone joints.
Bone Attributes
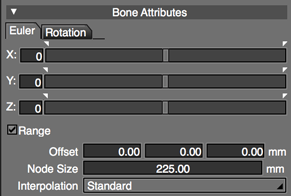
Euler Settings

- X, Y, Z Text Boxes and Slider Controls
- Rotates the Euler angle in each of the X, Y, and Z directions using the center of the bone as the axis. Each value is relative to the joint's initial state (represented by 0). This makes it easy to understand how much the joint values have changed.
Selecting the Range checkbox allows you to limit the angle of rotation of the bone to the specified minimum and maximum values. This makes it possible to use bones much like rotator joints, limiting the rotation of the bones in Joint Mode.
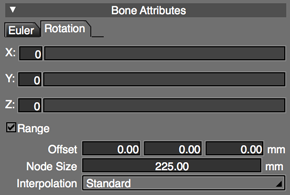
If the Rotation tab is selected, the bone is rotated relative to each XYZ axis. Angle limits specified on the Euler tab are used.
- Range
- When the Euler tab is selected, enables minimum and maximum angles of rotation along each XYZ axis.
- Offset
- Displays the offset distance from the original bone location in each of the X, Y, and Z directions. To change the offset distance in any direction, enter a new value for X, Y, and/or Z. Changing the offset distance allows you to move the bone when animating.
- Node Size
- The bone radius as displayed in the Figure Window. This has no effect on the behavior of the bone itself.
- Interpolation Pop-up Menu
- The interpolation method used for the quaternion calculation. Select from Shade 15 (Recommended), Shade 13 Compatible, and Shade 12 Compatible.
The default setting is Shade 15 (Recommended).
Selecting Shade 15 (Recommended) can avoid the following issues:- With Shade 12 Compatible selected, when a ball joint is not set to 0, breaks can appear in a figure when editing skin values
- Applying skin settings to a rotated ball joint and changing the weight settings can result in vertices rotating incorrectly (this problem occurs only with joints set with rotation values, even if those joints have been reset)
Caution Shade 15 (Recommended) interpolation makes skin settings easier, but is not compatible with previous versions of Shade3D.
Rotation Settings

- X, Y, Z Text Boxes and Slider Controls
- Slider controls on the Rotation tab can be dragged from any position. A starting value of 0 is displayed, irrespective of the joint value. The basic role of the Euler tab sliders and text boxes is the same as that of the Rotation tab sliders and text boxes.
Bone Axis Alignment Settings

- Auto Align
- If the bone's child parts were moved in Object Mode, this control corrects the direction of movement, in local coordinates, to the axis specified in the Axis pop-up menu.
- Axis Pop-up Menu
- Select X, Y, Z or Custom for the bone axis alignment. Specifying a vector in the Bone Direction text boxes automatically changes this menu to Custom.
- Bone Direction
- Used to display and modify the vector used as the alignment axis.
- Apply
- Click this button to immediately apply any changes made to the Bone Axis Alignment.
If the Bone Direction vector is not a unit matrix, it is converted to a unit matrix.